Pallet Palace
Chicks love it!
Thanks to all at BYC for advice and tips. Also thanks to BYC for the #1 vote in Coop Design Contest!
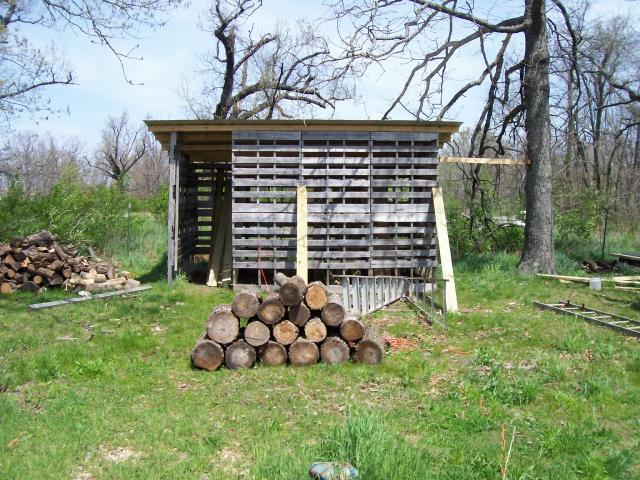
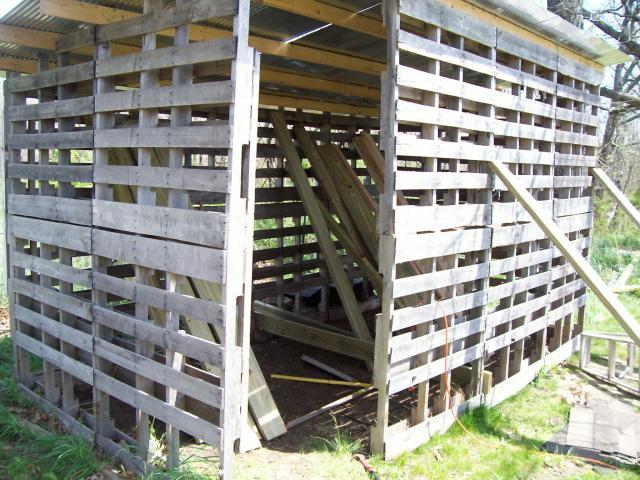
This
originally started out as a wood shed, so there are no early
construction pictures.
This was built using 22 standard oak
pallets. Making sure you use the same make of pallets is very helpful.
If one is different this makes putting up interior and exterior walls
very difficult.
- Back wall - 8 pallets = 8' x 16"
- Side walls - 4 pallets = 8' x 8'
- Front wall - 6 pallets = 8' x 16' (leaving opening for door)
Walls and Roof:
For all the walls I started by laying 4
skids in a square. Start by building back side first. Make sure area
is flat as possible so skids line up top and bottom. Screw the 2 skids
laying side by side together through the side boards. After 2 sets are
screwed together now join the 2 halves. You can either toe in screws
joining them or run a couple 2x4's through the side of top 2 and joining
bottom 2.
After you're all attached you can stand your wall up
(another person helps here). It helps if bottom of wall is close to
where it will be set so that when you stand it it is close to it's
permanent position. Brace the wall by attaching 2x4's to sides and
wedge in the ground until you're ready to attach side walls.
Repeat the steps for sides and front
wall. Front wall is a little different being you're only attaching 6
skids and it will not reach side wall. this will be the opening for
your door.
Once your walls are joined and
standing you can start screwing them all together. This is where a
level comes in handy. Get the back wall level as possible and attach
side wall to it by screwing together or by 2x4 inside. Make sure if you
set wall on the inside of the back wall, forming an L, you do the same
on the opposite side.
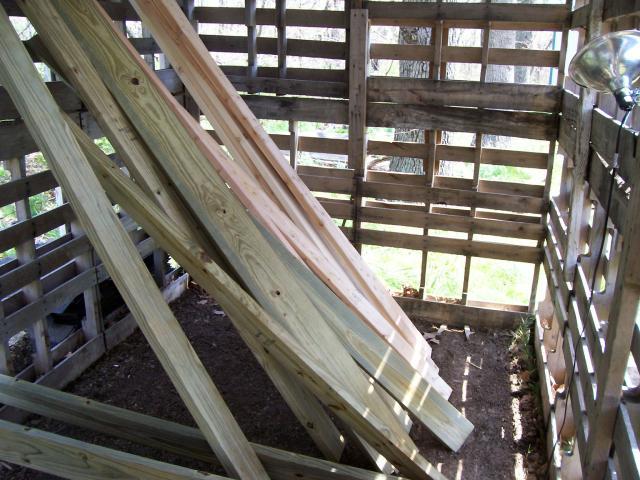
Roof
is 5 - 2x4x20 running from side to side (I used tin. If you're wanting
to cover with plywood and shingle you will want to run 2x4x10's from
front to back). I lowered the back wall to 6' for a slope for roof. I
left the center runners on skids to attach my 2x4x20's.
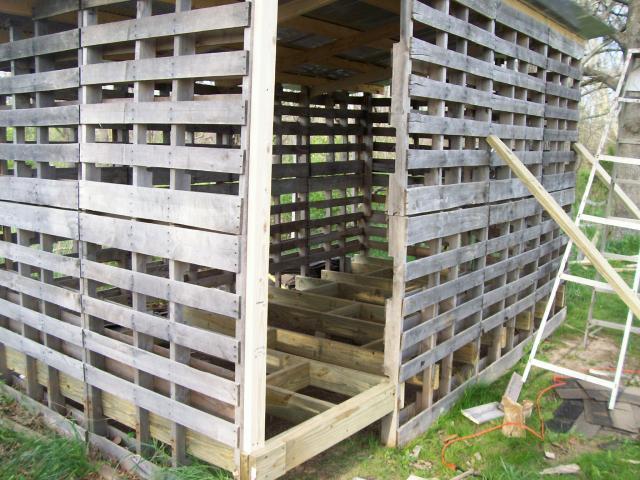
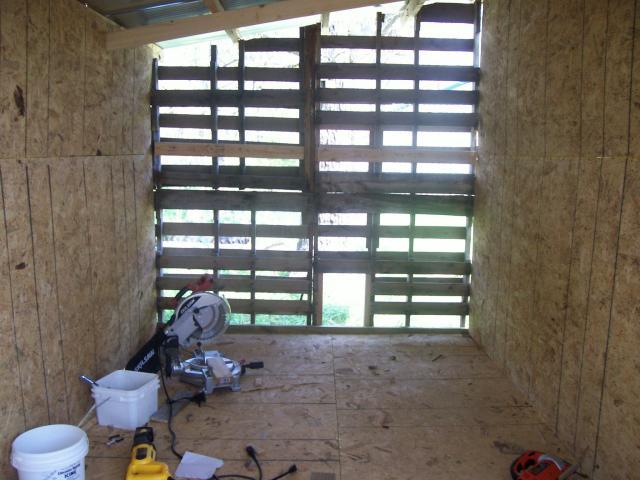
Floor:
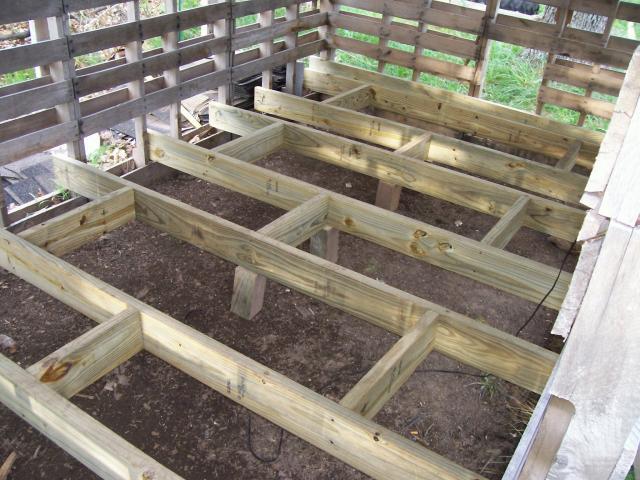 For
the floor I left the bottom wood of skids intact. I cut away the next
horizontal piece of wood above that out. Leave the runners of the skid
in place, this is what you will attach your floor boards to. I then ran
treated 2x6x8 boards across the bottom and attached the the back and
front runners at every 2'.
Make sure they are level when you attach
them. Also make sure you have boards at the 8' mark for your floor to
attach to. I put 2x6 pieces in between the boards in offset pattern for
support and I also put pieces along the entire outer square So i could
attach floor to them. I put sections for 4x4 under in spots just for
added support.
For
the floor i used 4x8 3/4" OSB board. This is strictly up to you if
you'd rather use plywood. Just lay your boards on top of the 2x6's and
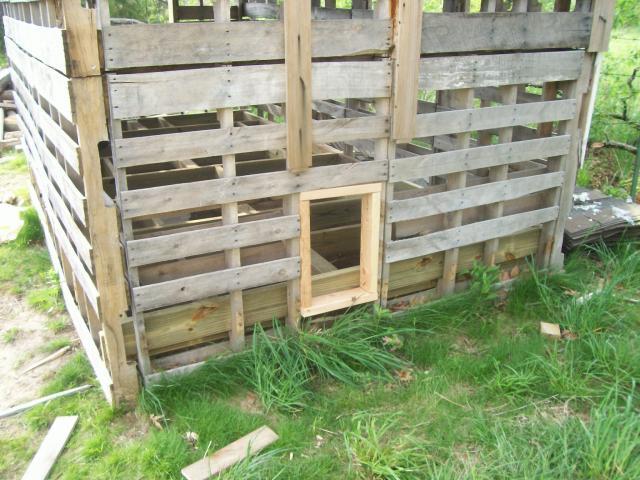
screw them on. At this point I also cut out my exit door to the run.
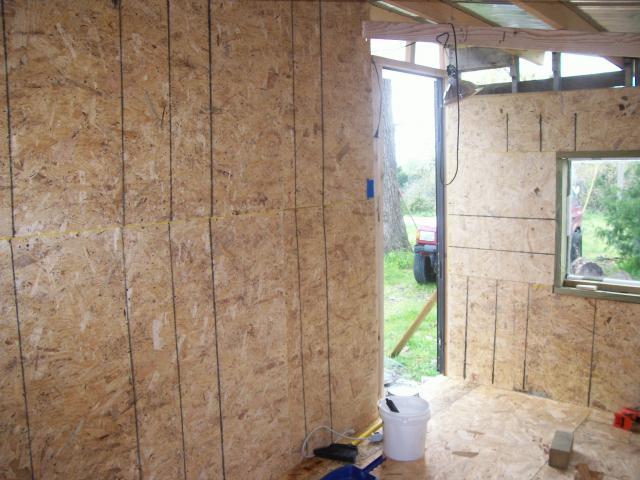
Interior Walls, Windows, Door:
***Important***
Determine where you want your windows now. It is very difficult to cut
out the skids once walls are up. Learned that from experience. Cut out
and frame your windows before interior walls go up.**** For my windows
I cut out size needed then used 1x6 or 2x6 for frames. These seem to
fit perfect as frames on pallets.
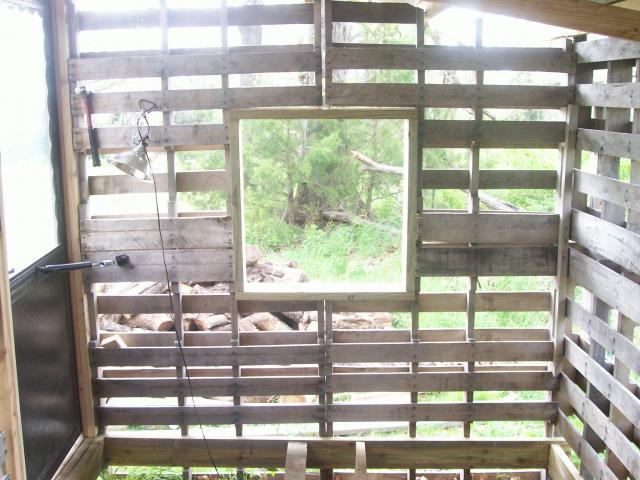
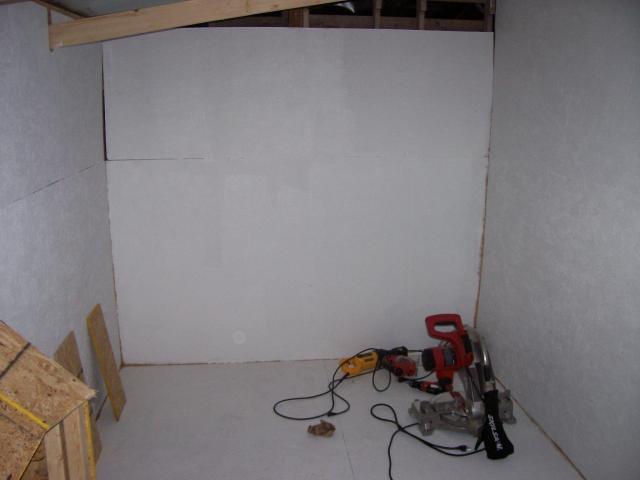
For the
interior walls I used 4x8 1/2" OSB. I did front and rear first then
side, but either way would be fine. Run any wiring g you may be doing
now. I installed 1 light and 1 outlet. Here in our county if you wire
to breaker box you have to pay taxes on it, so I used heavy duty
extension cord so it can be unplugged if the assessor comes.
Now grab
your boards and put them up and screw them on. Leave the upper section
of the sides open for ventilation. Now you can paint the color of your
choosing.
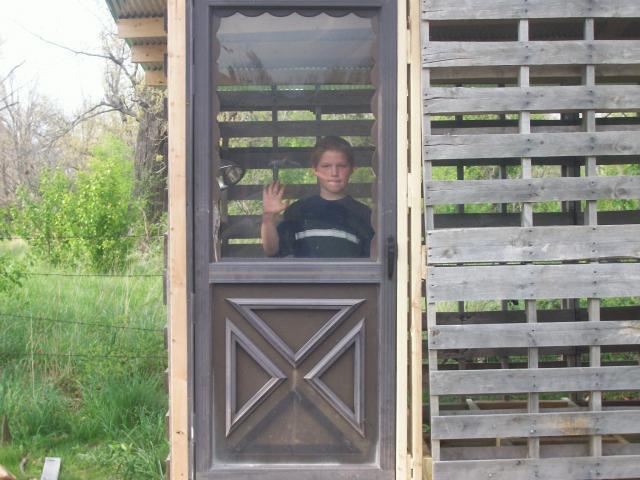
Frame your door making sure all is level and straight. Use 2x4's with shims as needed to get door to open and close flush.
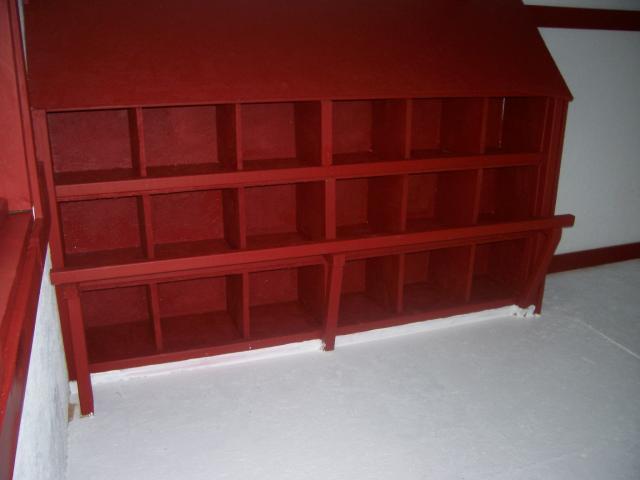
Nesting Boxes:
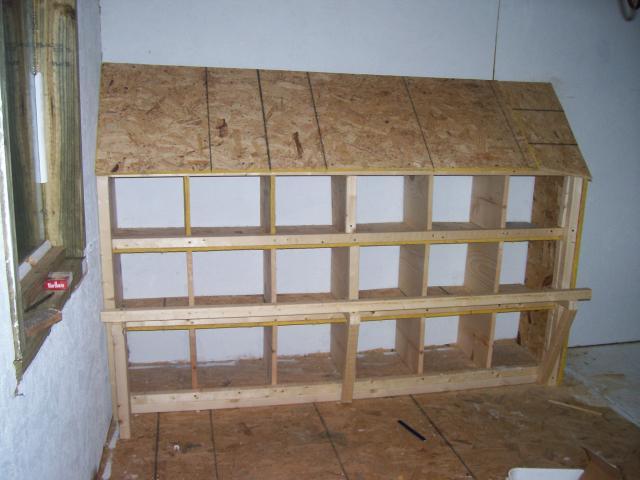 Ok,
I have been told that there are too many boxes here so it's up to you
how many you wish to make. I just put 2x4's down on floor 12" apart. I
made a rectangle with 1 more middle support. On top of this I put my
1/2 osb board. I attached a 2x2 to the front of the boxes. I used 1x12
from dividers cut 12"x12". Screw dividers into the 2x2 and toe screw
into wall in the back. I cut 3 sections of 2x2 for sides and middle for
support of next level. Osb on top of your dividers and repeat
process. For top I attached a 2x4 to the wall and sloped osb roof for
boxes. I used remaining 2x2's to make a small perch between bottom and
top. Done! Paint!
Ok,
I have been told that there are too many boxes here so it's up to you
how many you wish to make. I just put 2x4's down on floor 12" apart. I
made a rectangle with 1 more middle support. On top of this I put my
1/2 osb board. I attached a 2x2 to the front of the boxes. I used 1x12
from dividers cut 12"x12". Screw dividers into the 2x2 and toe screw
into wall in the back. I cut 3 sections of 2x2 for sides and middle for
support of next level. Osb on top of your dividers and repeat
process. For top I attached a 2x4 to the wall and sloped osb roof for
boxes. I used remaining 2x2's to make a small perch between bottom and
top. Done! Paint!
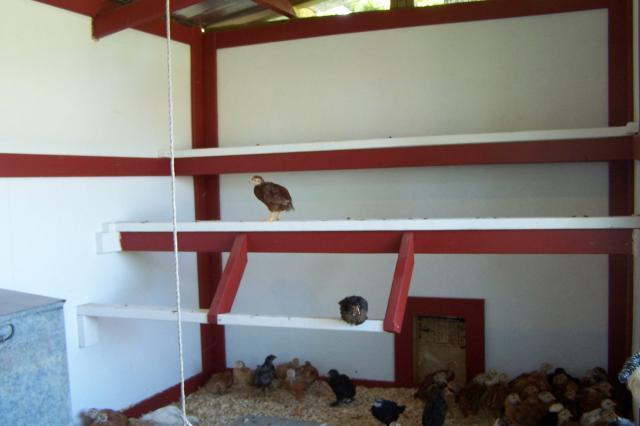
Interior Trim and Roost:
Trimming
the inside, or painting is strictly up to you. I used trim to cover
the gaps between wall boards I put up. I thought it gave the entire
inside an awesome look. 1x4's were used for trim. Painted them red to
accent the white.
For
the roost I set 2x4's across this side up at 3' and 4'. I put flat
side 2x4 on top of this. I used pieces of 2x2 on each side of the 2x4
to hold it in place that way I can remove it for cleaning. I also added
a small step up roost at 2' for heavier birds to give them a lift.
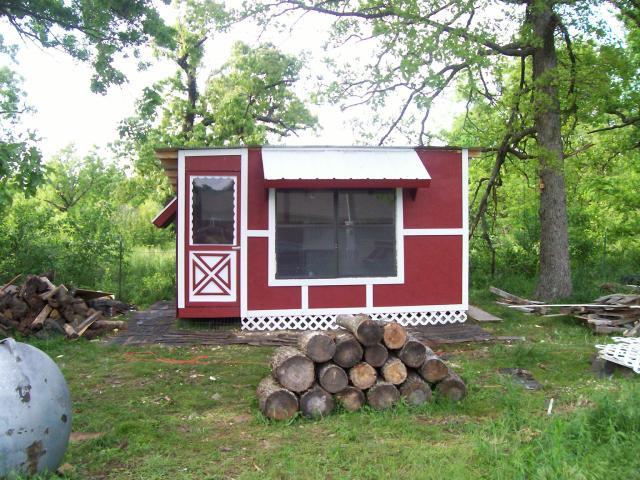
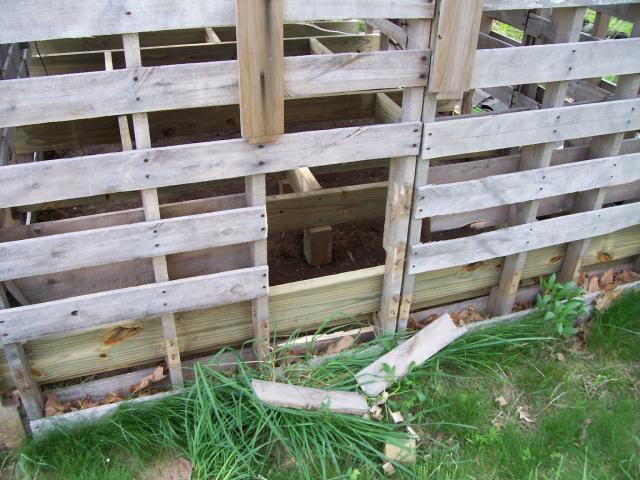
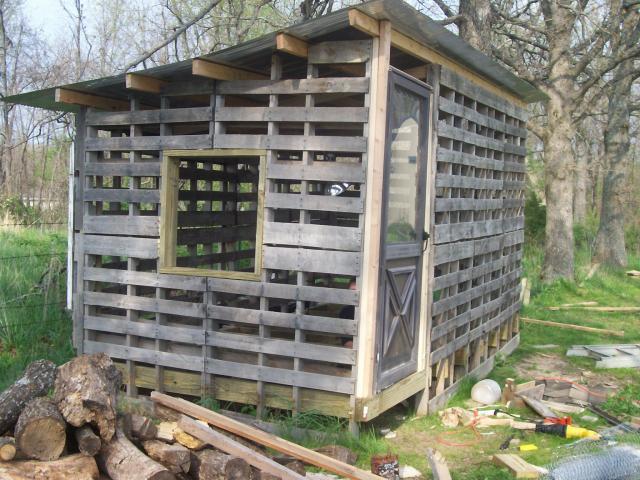
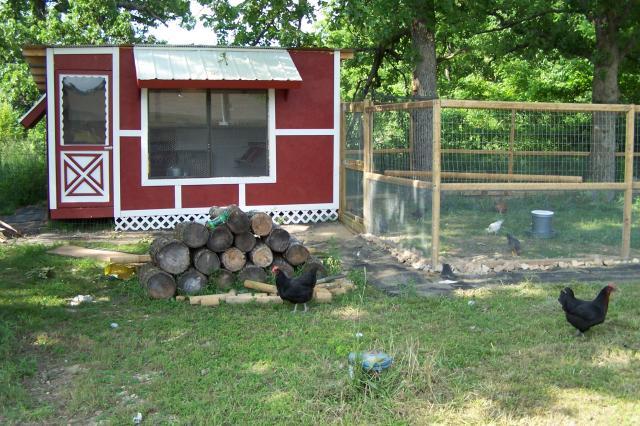
Exterior of coop:
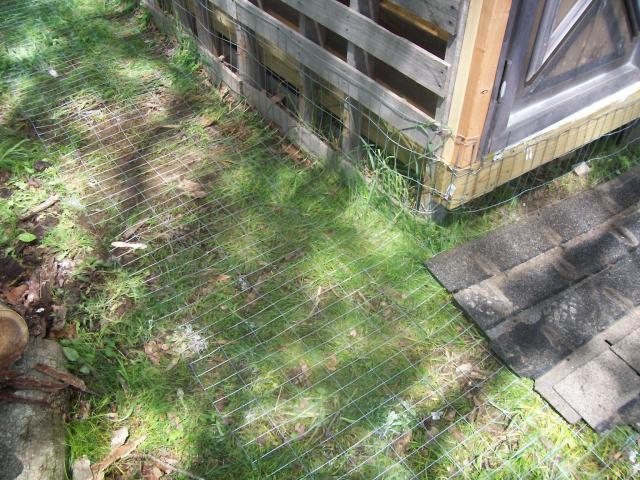
Before
you start hanging exterior boards now is the time to predator proof
your bottom. I used 25 ga metal wire all the way around coop with 3'
apron. Run wire up high enough so that your exterior walls will overlap
it. I covered the apron with old roofing shingles to keep weeds down. I
will cover this later with dirt.
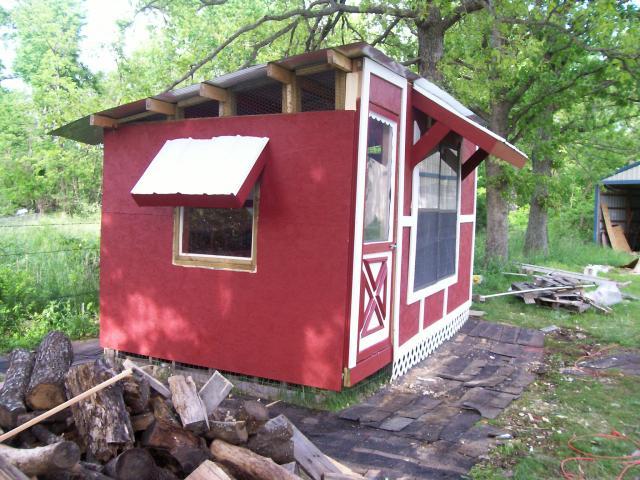
You
also want to cover vents at the sides of your coop now. Hang your out
side walls the same as you did the interior (just with a lot more room
to work). Cut out for windows and run door. I also used trim to cover
board gaps on out side using 1x4's and painted white to accent red. I
made awnings to cover window by using 1x6's. Cut at 45 degree angle to
attach to coop then attached a cross board at the ends. I used some
colored tin to cover. I used some left over lattice I had around to
cover the bottom of the coop.
Not completely done, but chicks love it!!
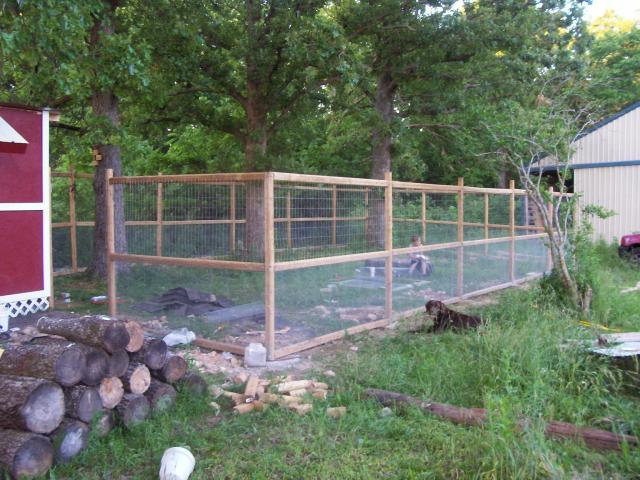
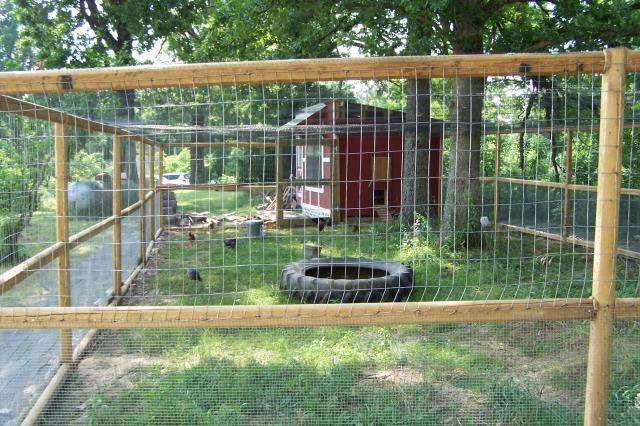
Outside Run:
- 65 = 8' Garden timbers
- 30 = bags of QuickCrete
- 5 = rolls of 36x25 1/2" hardware cloth
- 5 = rolls of 36x50 25 ga welded wire fence
- 3 = 1x6x8 treated for gate
- 1 = gate latch
- 1 = rented auger Home Depot
- 2 = rolls of 7'x100' deer netting
My
run was made using 8' garden timbers set 2' deep and set in concrete.
Set 17 posts using a rented auger from Home Depot. I cut tops off posts
as some were deeper than others do to our rocky soil.
The top, bottom,
and middle rails are also 8' garden timbers. Middle set at 36" and top
at 6' to fit wire.
Bottom
wire is 36" 1/2" hardware cloth. Top is 36" 25 ga welded wire. Outside
perimiter of run is aproned with 25ga wire also laid out 3' and covered
with roofing shingles to keep weeds down.
Chicks first day in run. "That's one small step for a chicken, one giant step for the flock".
Gate
is made from 1x6x8 treaded lumber cut to height with 3 dividers for
support. I covered gate with 1/2" hardware cloth. Latch is a sliding
pin latch that locks into a drilled hole in the post. Coop sets on a
slight slope so I put another 1x6 at bottom of gate to cover gap.
Entire
top is covered with deer netting. We do have hawks in or area so
better safe than sorry. I used roofing butt tabs to hold netting down.
They are nails with a green circle plastic tab on them. They worked
great on net. (You can see a few in above pic)
First day in run.
This
design is great for those of us that don't really understand framing
walls, roofs, and other construction aspects of building a coop.
It
also saves you quite a bit of money on lumber costs for you can get
pallets free if you look around.
I tend to go overboard, but you can
easily go with dirt floor, or no interior walls or trim to cut cost.
I
hope other find this helpfull for them to get their project started and
share in the joy of watching their chicks step out into the real world
for the first time.
Jjamerb's Pallet Palace Chicken Coop http://www.backyardchickens.com/a/jjamerbs-pallet-palace-chicken-coop
..


 The Sealy Dog Bed launched in October 2013 and has already achieved
critically acclaimed success being voted the "Dog Bed of the Year" .
Sealy has created the leading dog bed using over 130 years of expert
sleep technology to maximize the comfort and support of every dog.
The Sealy Dog Bed launched in October 2013 and has already achieved
critically acclaimed success being voted the "Dog Bed of the Year" .
Sealy has created the leading dog bed using over 130 years of expert
sleep technology to maximize the comfort and support of every dog.


