Treating your layer hens to a little TLC will mean delicious, golden-yolked eggs for your morning breakfast.
Back in the days before my layer flock came to enliven life on our
farm, I would have picked the egg for sure—or maybe the egg carton.
After all, the runny, pale-yolked eggs I cooked came from cartons sold
at the grocery store, not from any chickens that I could see. My
perspective changed, however, when I brought home our first fuzzy
chicks, watched them grow into gawky pullets and waited—and waited—with
bated breath for our first farm-fresh eggs to magically appear.
I eventually learned that not only did you first need chickens to
have eggs (obviously), but to start getting eggs, you also needed your
pullets to reach about 20 weeks of age. And to get an ongoing supply of
good eggs, your chickens needed the right food, clean nest boxes,
sufficient daylight and more. In other words, because an egg’s quality
reflects the care and management the hen receives, getting good eggs
takes some work—and not just on the chicken’s part. Take it from anyone
who has ever kept a layer flock, the delicious results are well worth
the effort.
If you think fun chickens giving delectable eggs every day sounds like a
recipe for hobby-farm happiness, our guide to getting good eggs will
help you collect the right ingredients.

Courtesy Wavebreak Media/Thinkstock |
What’s In an Egg?
Before we look at what should go into a laying chicken, let’s talk about
what comes out. That amazing chicken egg has a protective, external,
porous shell consisting mainly of calcium carbonate covered with an
invisible protein barrier called the cuticle that shields the interior
from bacterial contamination.
These structures, along with an inner membrane, surround a cushiony,
cloudy albumen (the white), composed mostly of water and protein. The
albumen in turn envelopes the nutrient-packed yolk, the egg’s main
nucleus of protein, fatty acids, vitamins and minerals. On average, a
chicken egg contains about six grams of protein and six grams of fat.
Provide the Basics: Food, Water, & Coop
Food
To keep its body functioning and to produce one of these self-contained,
nutrient-rich units each day, it’s essential a laying hen receive a
balanced diet with adequate levels of protein, carbohydrates, fat,
vitamins and minerals.
For laying flocks older than 16 to 20 weeks, experts generally recommend
a balanced layer ration containing 16- to 18-percent protein and
approximately 3½-percent calcium to promote strong eggshells.
Many raisers also offer free-choice oyster shell for extra calcium in
case their feed falls short of this important mineral. Calcium
deficiency can result in thin-shelled eggs and leg problems. You may
need to offer your birds the higher-protein feed during periods of peak
egg production and when hot weather causes birds to eat less.
If you keep your flock confined, don’t forget to provide them with a
source of insoluble grit to assist in grinding the feed in their
gizzards. You’ll find oyster shell, grit, formulated layer rations and
various types of feeders at your local feed store. Some even carry
balanced, organic layer diets, if you prefer your flock dine on food
free of antibiotics and grown in a sustainable fashion.
Chickens allowed to free-range pastures, orchards, gardens or other
outdoor areas will consume a nutritious and diverse mix of insects,
grains, berries, seeds and plants in addition to their formulated fare.
Many chicken keepers treat their flocks to other goodies, too, from
bread to surplus cow’s milk. However, a number of poultry experts advise
against this practice.
"A lot of farmers try to save money by feeding scratch grains and
household food scraps,” says Jacquie Jacob, PhD, poultry extension
associate at the University of Kentucky College of Agriculture, Food and
Environment. "This dilutes the nutrition of the laying feed and can
result in shell weakness or cessation of production altogether.”
Water
Laying chickens also require a constant supply of fresh, clean water.
Not only does a chicken’s body use this life-sustaining liquid for
numerous physiological functions, but water also comprises more than
half of an egg’s volume. You must ensure your birds have a reliable
water source during both hot and dry periods and freezing weather or
their egg production will suffer.
Coop (The 5 Steps)
Along with a balanced diet and ample water, your chickens need
protection from the elements, predators and disease to stay alive and
healthy—and thus keep laying eggs. A cold, wet chicken, for example,
will be forced to spend its energy reserves trying to stay warm rather
than on egg production. A sick or stressed chicken will often reduce its
egg output or completely quit laying. And it goes without saying that a
bird killed by fowl cholera or a coyote will not be giving you any more
eggs—ever.
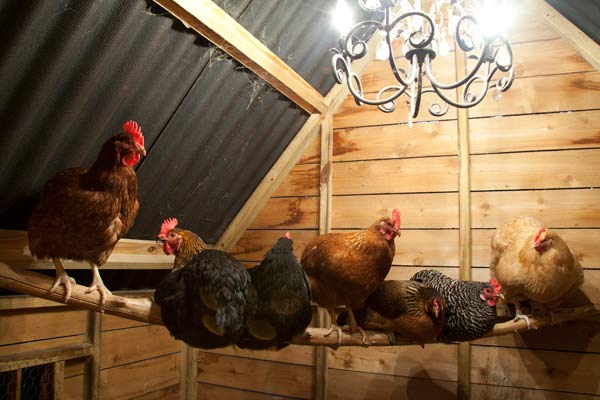
1) A Proper Coop
A snug, secure, well-built and properly ventilated
chicken coop will
offer your flock shelter from inclement weather, give your birds a
predator-safe spot to roost at night, and discourage the presence of
disease-carrying rodents and wild birds.
Outdoor access into a covered coop or pen gives the chickens a
protected place to dust bathe, scratch for bugs and preen in the
sunshine. However, not all raisers keep their birds cooped
round-the-clock; many allow their flocks to free-range around the farm
during the day, while others utilize pasture-based systems that
incorporate
mobile chicken tractors or moveable poultry netting.
Both confinement and free-range systems have their pros and cons,
Jacob says. Free-ranging birds may have more room and increased
opportunities to behave like chickens and forage for a varied, natural
diet, but
outdoor living does pose definite risks.
"Many people think that having chickens romping around a pasture is
idyllic, but they can’t imagine all the threats the birds are exposed
to, such as diseases and predators,” says Francine Bradley, PhD, an
extension poultry specialist with the Department of Animal Sciences at
the University of California, who recommends confining layer flocks. "If
your birds are enclosed, you’ll also be able to quickly find the eggs.
You can supply a clean nest box so the chicken lays there instead of
hiding its nest somewhere or laying its eggs in a mud puddle. This
increases your chances of getting clean eggs.”
2) Keep the Coop Clean
Whichever raising system you use, avoid crowding your chickens and
keep their environment as clean and dry as possible.
Regularly layering fresh litter in houses, preventing mud formation
in pens and raking up droppings will help prevent your birds from
tracking feces and mud into their nest boxes and onto their eggs.
Hygienic conditions promote healthier hens, as will paying attention to
biosecurity issues, such as quarantine periods for new fowl and limiting
visits to your farm from other chicken raisers.
"If a visit is necessary, the farmers should have showered before coming to the farm and should not wear clothing, including
baseball caps, shoes and boots that they’ve worn anywhere near their own birds,” Jacob stresses.
3) Provide Nest Boxes
To get eggs—especially nice, clean, intact ones—you’ll need to persuade
your chickens to lay where you want them to lay, not in some poopy
corner of their coop or hidden in tall grass somewhere out in the back
40.
Bradley stresses providing plenty of covered nest boxes for your
flock; one for every four hens. You can purchase easy-to-clean nest
boxes from poultry supply companies or build your own from wood. Install
the boxes about 2 feet off the floor and deeply layer each with clean,
soft litter, such as non-toxic wood shavings, to provide cushioning for
the eggs and to absorb droppings.
"You might want to tack a little cloth over part of the opening to
make it secluded and dark. Chickens like this and it will help prevent
egg eating,” Bradley says. "You’ll want to put a plastic or rubber egg
in the box first to attract the chickens to the nest box.”
For birds allowed outside, Jacob suggests keeping them inside until
later in the day so you won’t have to embark on an Easter egg hunt every
morning.
Most chickens finish their egg-laying by 10 a.m. or so. Knowing
exactly where your birds deposit their eggs will enable you to find and
gather the eggs promptly, making it less likely for them to become
broken and attract a hungry chicken’s attention.
"Egg eating is a very bad vice and one chicken can teach the others
this habit,” Bradley says. "It’s best not to let the habit start to
begin with.”
4) Set Up Lights
Light is another important factor that affects egg production and a good
many neophyte chicken keepers have been left scratching their heads and
wondering why their chickens quit laying as winter set in. (Note: Hens
will also cease laying during molting periods.)
"Hens come into production with increasing hours of light per day and
go out of production with decreasing hours of light per day,” Jacob
explains. "A minimum of 14 hours of light per day is necessary to
maintain egg production. Timers can be used so that the [artificial]
lights don’t have to be on all day; they can come on before sunrise
and/or stay on after sunset in order to maintain the required number of
hours of light per day.”
5) Clean Eggs Well
Frequent egg collection coupled with clean, dry, uncrowded nest boxes
and coops will go a long way toward keeping your flock’s eggs clean. Not
only is a pristine, freshly laid egg a thing of beauty, but it can go
right into a carton and into your fridge, no scrubbing required.
"If eggs are found clean, there’s no need to wash them since it would
remove the bloom, or cuticle, which is the invisible, protective layer
naturally found on eggs,” Jacob says.
But despite our best efforts, sometimes dirty eggs happen. With a small amount of dirt or droppings, you can:
- Dry clean the egg by buffing it off with some fine-grit sandpaper.
- Wet washing, although the normal procedure in commercial
operations, can result in bacteria being sucked into the egg if done
improperly (for example, in a cold bucket of water).
- Got some really filthy eggs? Toss them out to be on the safe side.
- As soon as you collect them, stash your fresh eggs
small-side down in a dated egg carton in the refrigerator. Don’t store
them with or near odorous foods like onions or fish. When cooking with
raw eggs, be careful you don’t cross-contaminate other foods and always
cook eggs thoroughly. Wash your hands well afterward with warm water and
soap.
Once you figure out the right ingredients, getting good eggs from a
small layer flock actually doesn’t take that much time and effort on a
daily basis.
In fact, it’s a wonder more people don’t keep chickens, given that
fresh-from-the-coop eggs look and taste so much better than
store-bought. As Golson has discovered, the straightforward recipe for
optimal egg production has changed little over the years.
"I have a favorite book, first published in 1895, called The Biggle
Poultry Book, which gives advice for the ‘urban hennery,’” she says. "It
used to be that most everyone had a few hens in their backyard to
provide eggs for the table. The advice that worked then is just as good
now: Provide a secure shelter, access to a yard and sunlight, good food,
and keep it clean. That’s it!”
Get more egg and chicken-keeping help from HobbyFarms.com:
About the Author: Cherie Langlois is a former
zookeeper and a freelance writer who has kept a variety of chicken
breeds—and enjoyed dozens of fresh eggs!—on her Washington farm for over
17 years.
..


 .
.
")
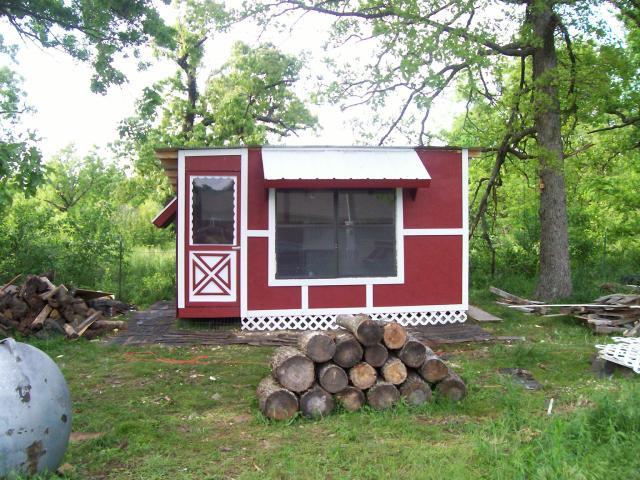
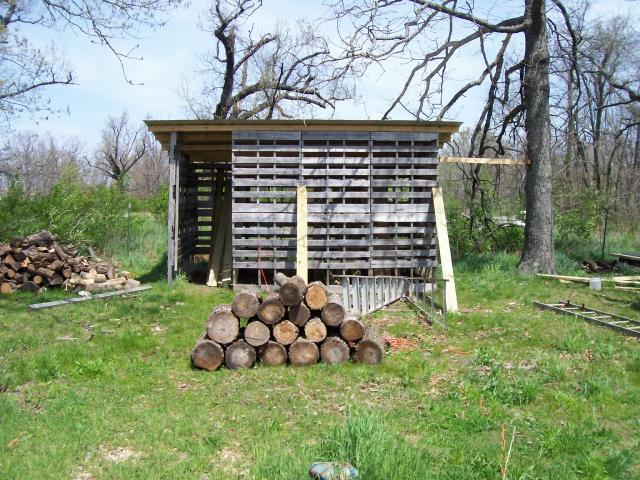
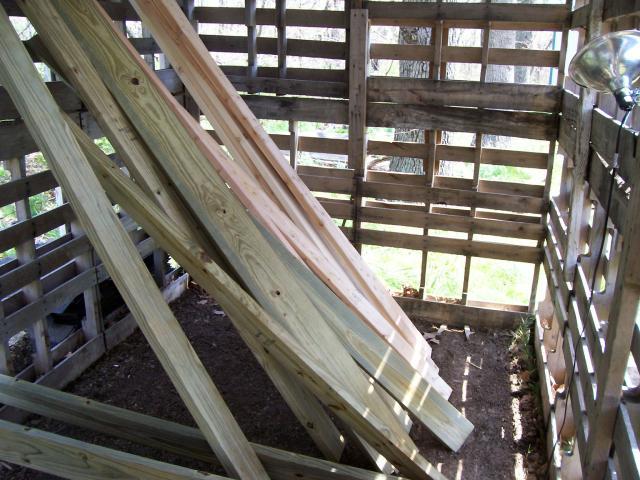
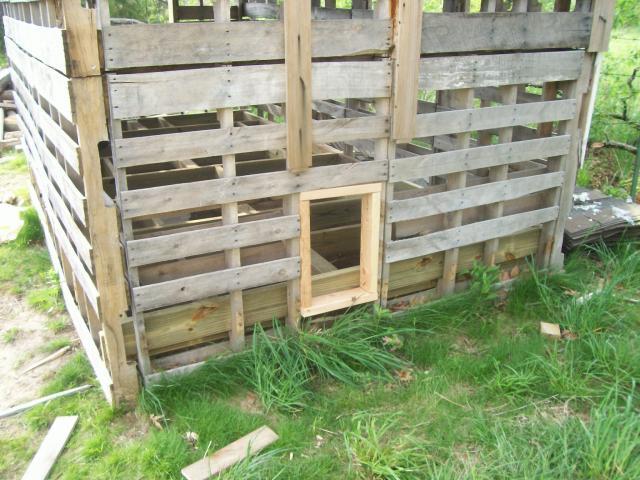
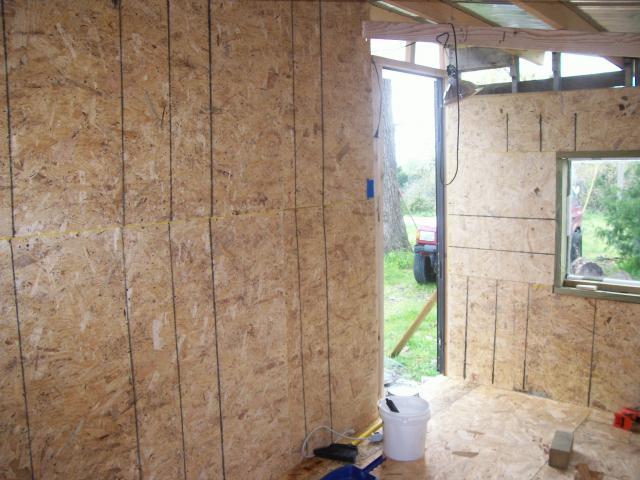
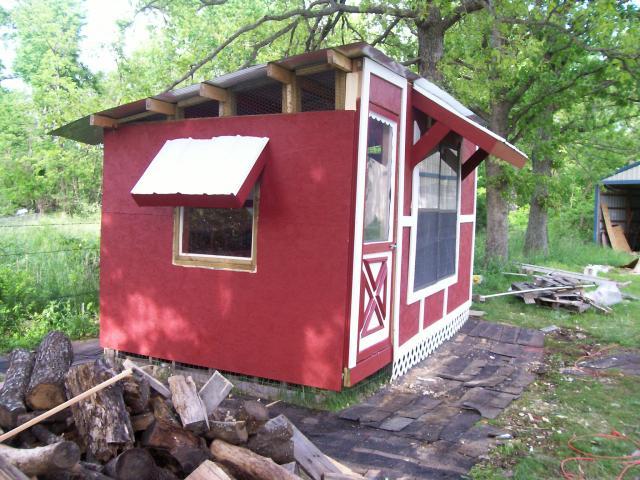
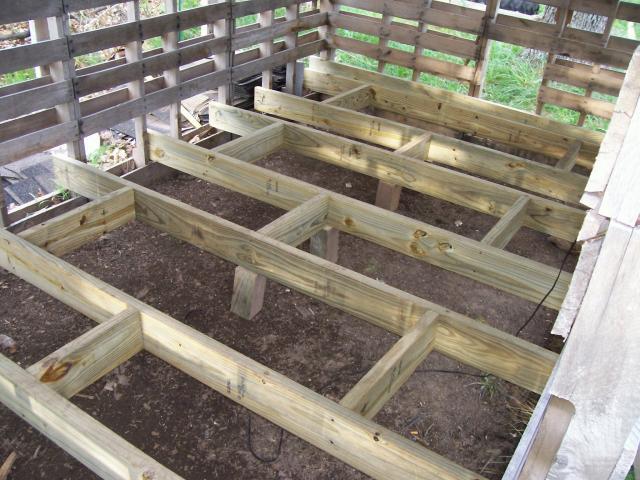 For
the floor I left the bottom wood of skids intact. I cut away the next
horizontal piece of wood above that out. Leave the runners of the skid
in place, this is what you will attach your floor boards to. I then ran
treated 2x6x8 boards across the bottom and attached the the back and
front runners at every 2'.
For
the floor I left the bottom wood of skids intact. I cut away the next
horizontal piece of wood above that out. Leave the runners of the skid
in place, this is what you will attach your floor boards to. I then ran
treated 2x6x8 boards across the bottom and attached the the back and
front runners at every 2'. 

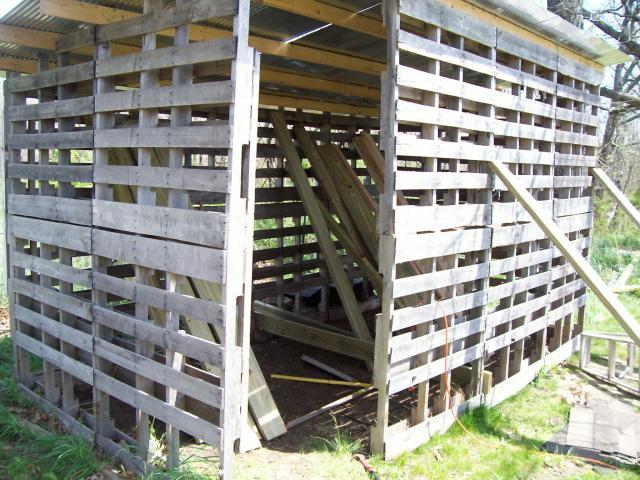
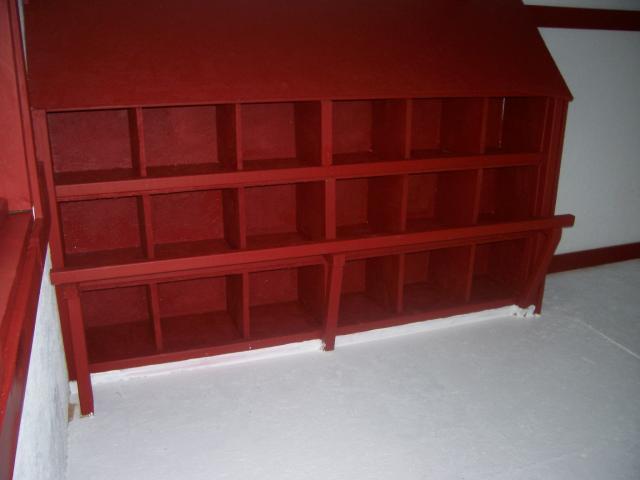
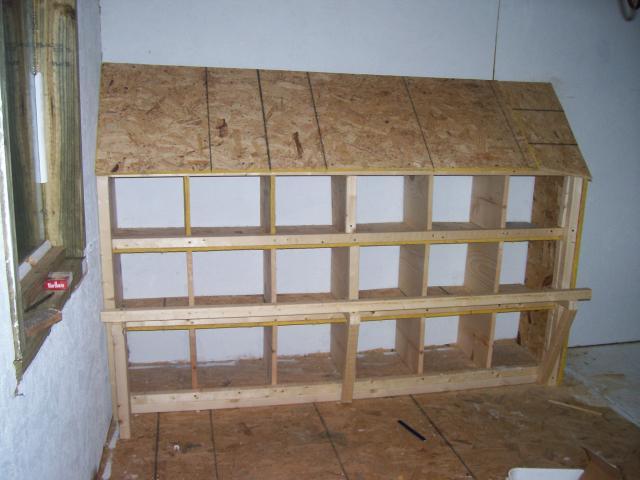 Ok,
I have been told that there are too many boxes here so it's up to you
how many you wish to make. I just put 2x4's down on floor 12" apart. I
made a rectangle with 1 more middle support. On top of this I put my
1/2 osb board. I attached a 2x2 to the front of the boxes. I used 1x12
from dividers cut 12"x12". Screw dividers into the 2x2 and toe screw
into wall in the back. I cut 3 sections of 2x2 for sides and middle for
support of next level. Osb on top of your dividers and repeat
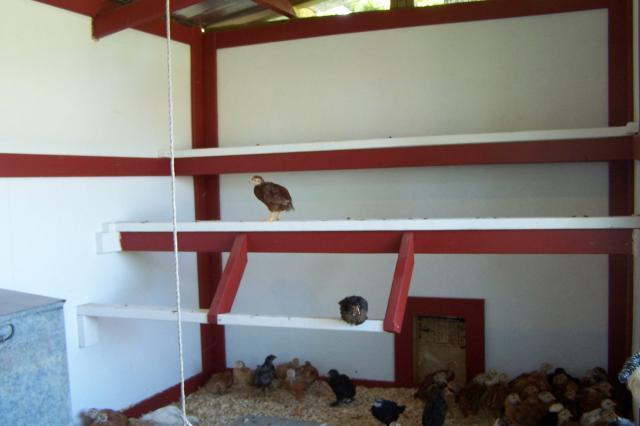
process. For top I attached a 2x4 to the wall and sloped osb roof for
boxes. I used remaining 2x2's to make a small perch between bottom and
top. Done! Paint!
Ok,
I have been told that there are too many boxes here so it's up to you
how many you wish to make. I just put 2x4's down on floor 12" apart. I
made a rectangle with 1 more middle support. On top of this I put my
1/2 osb board. I attached a 2x2 to the front of the boxes. I used 1x12
from dividers cut 12"x12". Screw dividers into the 2x2 and toe screw
into wall in the back. I cut 3 sections of 2x2 for sides and middle for
support of next level. Osb on top of your dividers and repeat
process. For top I attached a 2x4 to the wall and sloped osb roof for
boxes. I used remaining 2x2's to make a small perch between bottom and
top. Done! Paint!


