Information and unique products for Dogs, Cats, Rabbits and Backyard Chickens

Wednesday, July 30, 2014

A New Pet To Protect Your Family And Chickens From Ticks


Pearl Guinea Rooster

As Lyme Disease, a tick born illness, has become more and more prevalent in the Eastern United States, many farm owners with livestock and family have turned to Guinea Fowl to help eradicate the danger. Guineas are especially known to immensely enjoy snapping up ticks out of tall grass where they tend to thrive and pose threats to dogs, children, and livestock nearby.

Guinea Fowl are also known for their alert behavior and vocal nature. Guineas are said to be effective at warding off hawks, rats, foxes and snakes with their cry; helping to protect not only themselves, but other chickens, ducks, or geese, on the farm that are prone to attack by predators.

Once raised from young, Guineas will pretty much live wild and roam free once mature, but since they are territorial, they will stay in close proximity to where they have been raised. Guinea Fowl also are an excellent bird to harvest for its meat, tasting almost identical to pheasant.


guinea fowl- great for eating insects in the garden without damaging the plants. Good watchdogs too, if anything new comes on the place you hear about it/them! (this includes any snakes they see)  

Guinea fowl- great for eating insects in the garden without damaging the plants. 

Good watchdogs too, if anything new comes on the place you hear about it/them! (this includes any snakes they see)

Photo by chris.murphy on Flickr

There are Brown, Buff, Buff Dundotte, Coral Blue, Chocolate, Lavender, Powder Blue, Purple, White, and the more common Pearl Guineas; and then there are the rare and exotic Vulturine and Crested Guineas.


Baby Guineas are called keets.

Their alertness and ear-piercing screeching make Guineas great "watch dogs."


Guineas will rid you of ticks, slugs, scorpions, fire ants, and many other pests.

Male Guineas select their mates, and they remain steadfast companions.

Hens can lay eggs as early as four months. Eggs are brown and small.

Guinea hens notoriously are indifferent mothers; therefore, incubators are used more often than not.

Hens don't screech like the males. Hens will utter two syllables sounding like "go back," buck wheat," or "patrak." Together they are a noisy bunch.

Original Post:   http://soonresources.com/hw2/guineahen.html


 Guinea hens are available through:

Guinea Fowl can be purchased in three forms. You can buy hatching eggs and try your hand at incubating, order day-old keets or even find adults if you look hard enough. The easiest option is ordering day-old keets, less time consuming than hatching your own and easier to acclimate to you and your property than adults.
pearl guinea fowl adults

Why Guinea Fowl instead of Turkeys or Chickens?
 
  • Predator Resistant
They may not be as tame as chickens and turkeys, but this can be a good thing. Guineas are constantly alert for predators and once one is spotted they erupt into a raucous alarm that can send a hawk on its way. Guineas will still need a coop and pen to return to at night, this takes some encouragement and training at a young age. Placing a light in the coop helps as Guineas don’t like going into dark buildings.

  • Pest and Weed Eating Machines
Guinea Fowl are excellent free rangers, perhaps one of the best in domesticated fowl. The Guinea flock will march through a property wiping out a whole slew of pests including but not limited to: snakes, rodents, ticks, scorpions, grasshoppers, crickets, locusts, beetles, ants, June bugs, spiders, weevils, grubs, bees, hornets, and wasps.

These high protein eating habits also can cut back significantly on feed requirements, that is if you have enough pests for them to eat. (Side note: if you raise bees on your property, make sure to keep them at least 1/4 mile away from your guineas).

Not only to Guineas love insects, but they love weed seeds, particularly grass, preventing the spread of said weeds into your crops or garden. They are also excellent defenders of fruit trees as they can fly up and take out pests up high.

The most popular Guinea in the United States is the Helmeted Guinea. It comes in several color varieties including Pearl, Lavender, White, Purple and many more.


guinea, fowl, keet, chicks, hatchlings

Getting Started with Guineas:
  1. You will need all of the same brooding equipment that is required for chickens. Guinea Keets will begin jumping very high at a young age, so it will be necessary to cover the brooder or they will start jumping right out.
  2. Guineas need a coop larger than chickens, about 3-4 sq. ft. per Guinea. They will also need a covered run if you live in an area with snow, Guineas will not trudge through snow.
  3. The best option for feeding Guinea Keets is Turkey Starter Feed, or a specific high protein game bird feed if you can find it. Later on adult guineas will prefer whole or cracked grains to corn.
http://www.fowlblog.com/2014/05/guinea-fowl/


 Guinea hens are available through:


..

Manure - The Other Big Benifit


The Joy Of Chicken Poo

As a gardener I take advantage of my chickens’ droppings whenever I can.

First, I get all dressed in my chicken cleaning uniform, gloves and boots, then trudge out to the coops with shovel in hand. When I clean the coops I make sure nothing is wasted and it all gets moved right to my compost pile. This helps cut down on waste sent to the dump, helps my garden thrive and makes the coop cleaning process multipurpose (they get a clean coop & I get fertilizer). Chicken Manure
The important thing to remember is chicken waste is considered “hot” when fresh, this means it’s high nitrogen can damage the root system of the plants. Letting your newly found fertilizer age is the best solution.

You can do this in one of 2 ways:   1) Load your chicken manure onto your compost pile to turn and age over time before adding to your garden.( See composter article below)  or  2) Add the manure to the garden at the end of the season, such as fall, when nothing is growing. Turn the soil then, and allow to age directly in the soil for spring planting.

If your manure is mixed in with a heavy amount of pine shavings, its a good idea to choose the “add to compost pile” option. The pine shavings need a lot more time to break down due thickness and also have a high acidity level.

Straw breaks down fairly quickly and you can choose to add that to your garden in the fall if its your choice of bedding in the coop. I prefer pine shavings over straw or hay, as it’s more absorbent (chicken poo is wet!).

When straw gets damp it can become moldy quickly, though both straw and hay break down much more quickly in the compost bin. I’ll happily put either one into my compost pile!

http://blog.mypetchicken.com/2012/04/13/the-joy-of-chicken-poo/

Chicken Manure Tumbling Composter

What does a  composter have to do with raising chickens? Well, if you have chickens, you have chicken manure … and if you’re a gardener (like me) this unlimited supply of manure can provide you with an endless supply of the world’s best organic fertilizer! 
In fact, out of the fluffy backside of an average-sized hen, 1 cubic foot of manure is produced every six months! All you have to do is a little simple math to realize that it doesn’t take long before you have to contend with a mountain of chicken poop! There’s an advantage to this abundant supply of waste, though. Unlike many other backyard animals (such as cats and dogs), chicken manure is rich in nitrogen, phosphorus and potassium. To a gardener, this “black gold” is a highly sought after organic fertilizer … but to a chicken keeper who enjoys gardening, it has another advantage: It’s free! Even if you’re not a gardener, composting the coop bedding and manure will result in a rich soil amendment that can be incorporated into established landscapes.

Fresh chicken manure, however, should never be added to the garden without first being composted for two to six months (depending on the method of composting). In the past, I’ve been a lousy, lazy composter; I would throw the coop bedding and droppings into the compost bin, and that was about the extent of my effort. Successful composting requires turning the compost, keeping it moist, checking the temperature. I failed at all of these requirements. This year, however, has been different thanks to my:
Composting Basics
As a Master Gardener, I like to refer to the University of Missouri Extension as a reference for all gardening-related topics; click on the following link to view the university’s guide on understanding, making and using compost: “Making and Using Compost.” Mother Earth News also has a helpful article this month, “How to Make Compost.” In a nutshell, here’s my general summary of composting: Compost is organic matter that has been decomposed by a process of aeration, heat, moisture and microbes. In a chicken coop, this organic matter consists of coop bedding and manure. 

When composting, the general rule-of-thumb is 1 part carbon (brown, e.g., coop/run bedding) to 2 parts nitrogen (green, e.g., chicken poop). However, because chicken manure is so high in nitrogen, a 1:1 or even a 2:1 mixture might be more appropriate. How long it takes to produce compost depends on the method of composting and how diligent and devoted the gardener is in turning, watering and monitoring the temperature of the pile. If done properly, the compost could be ready to use within two to three months. Otherwise, it’s probably wise to let it age for six to nine months before incorporating it into the garden soil.


A common method of composting is a simple heap or pile, or a constructed compost bin. Coop bedding and manure are added in layers to the bin and a third layer of microbe-rich soil or compost can also be added to help start the decomposition process. Adding moisture or water to the layers (material should be about as wet as a well-wrung sponge) will increase the internal temperature of the pile. It is recommended that the compost pile heat to 130-150° F and maintain that temperature for three days. Continue turning, watering and monitoring the temperature until the entire pile has been through the heating process. Then wait … Let the compost continue to age another three to six months; it should be dark, crumbly and “earthly” smelling (there should be no odor of manure).

Benefits of Composting Tumblers
A compost tumbler is simply a container that can be rotated to mix the composting materials. The fact that the organic materials are in a sealed container also helps contain the heat generated by the composting process. The added heat, combined with the ease of turning the material, produces compost quicker than traditional methods. Here’s a list of proposed benefits of a tumbling composter:
  • As mentioned above, it’s fast. Some sources boast that, “in as little as three weeks, you’ll have dark, rich compost!”
  • It will keep rodents and raccoons out of the compost.
  • Eliminates composting odors.
  • As compared to a heap of rubbish, a tumbler has more curb appeal.
Even though the benefits seem appealing, Mother Earth News did a review on compost tumblers a few years back and came up with the conclusion that a properly attended compost heap worked just as well. However, if you’re similar to me, you don’t have the time, desire or the muscle it requires to properly attend to the compost bin! With this easy-to-do method, I’ve produced better compost in three months than I have in all the years I’ve been gardening!

Pros and Cons …
Even though I’m thrilled that I’m finally composting using a fast, easy and efficient method, I’ve already learned a few strategies to make the compost even better. Adding more than just straw and manure (i.e., kitchen waste, garden extras, leaves) to the barrel makes for a richer, higher-quality compost. Also, shredding the material before adding it to the tumbler speeds up the decomposing process. (I use a push mower with a leaf bag attachment.)

As for the tumblers … Why two? When one tumbler is full, I water it down and then start turning it for a few months. During the months that I’m spinning one tumbler, I’m filling up the other one!

   DIY: Chicken Manure Tumbling Composter!
 Visit http://www.communitychickens.com/diy-chicken-manure-tumbling-composter/ for details
If your skills and resources are limited, I did find a few similar DIY instructions that might be easier to accomplish.

Click on the links below:
DIY Spinning Composter
Compost Tumbler
Make a Compost Tumbler
Very Simple Homemade Compost Tumbler (No carpentry skills needed!)
To see what else is happening on our Southwest Missouri property, visit …the garden-roof coop.

The need for composting is unquestioned.  To see complete details of various composter designs, features and sizes please visit this comparison site for compost tumblers.

.. 

Consider A Marek's Vaccination When Ordering Your Chicks

What is Marek's Disease and how do I control the disease?
 
Marek’s is a widespread disease affecting domestic chickens in all sections of the world. 

It is characterized by lesions affecting the nervous system, organs, and other tissues. 

Young chickens under 16 weeks of age are most susceptible. 

There is no treatment for Marek’s once the birds are infected. Chicks must be vaccinated as close to the time of hatch as possible for the vaccine to be effective. 

Some hacheries vaccinate all of their own breeding stock and strongly feel that you should do the same. Vaccinating your birds for Marek's is another appropriate step in strong poultry management. Don’t take any chances.

When offered vaccinate your chicks prior to shipment of your order. Don’t forget to mark your order blank in the appropriate location for vaccination.

Vaccinations are offered by http://www.mcmurrayhatchery.com/faqwhatismareks.html  and http://www.efowl.com/?Click=44040  and  http://www.californiahatchery.com/?AffId=34 when requested at the time of ordering your new chicks

Baby Chicks FAQ's


http://media-cache-ak0.pinimg.com/originals/e9/8a/dd/e98adda3881e7da8ab3ad7cc2382c637.jpg

THE CARE OF BABY 
CHICKS

Poultry Need: Feed, Water, Heat, Light & Space.

FEED:
Use a commercial chick starter for the first 8 weeks. On the first day cover the litter with newspaper and spread some feed on the papers and have your feeders full also. This will allow the new birds to find the feed. Use a 2 foot feeder for each 25 chicks. After the first day remove the papers from the starting area. Please refer to the order blank for feed protein levels for the type of poultry you are ordering.

WATER:
Have a 1 gallon chick waterer for each 50 birds. DIP THE BEAK OF THE CHICK IN THE WATER BEFORE YOU TURN IT LOOSE. For the first 2 days add 3 tablespoons of table sugar to each quart of water for extra energy. For best results, have either Quik Chik, Broiler Booster, or an antibiotic in the water. Your birds will be thirsty when you get them. A taste of water right away helps them to find more water soon. Most baby bird loss is caused because the bird doesn't start to eat or drink. Never let your bird run out of water.

HEAT:
The temperature where the birds are should be 90 to 95 degrees for the first week. Reduce the temperature 5 degrees per week until you get to 70 degrees. Then they shouldn't need any more heat. A good source of heat is a 250 watt bulb. (Red bulbs are better than white. They cause less picking.) Hang it 18 inches from the floor. The temperature directly under the bulb will be higher than 90 degrees but the birds will adjust themselves to the area they like. Use 1 bulb for each 50 chicks in cold weather. Use 1 bulb for each 100 chicks in warm weather.

LIGHT:
If you use a heat bulb, this will also serve as the light you need. Otherwise, be sure to give your birds light. Use a 75 watt bulb on dark days. Have a small light for night - 15 watts or similar - to keep them from piling.

SPACE: Try to provide 1/2 square foot per bird at the start. For starting 50 chicks use a draft shield (see below) and make a circle about 5 to 6 feet across. For 100 birds, make the circle 7 to 8 feet across.

OTHER IMPORTANT MATTERS

DRAFT SHIELD:
Cardboard put in a circle about 12 inches high around the birds helps cut down drafts on the floor. Be sure the circle is large enough to allow the birds to get away from the heat if they want to.

LITTER:
 Wood shavings, rice hulls, or ground cobs make good litter. Do not use cedar chips,sawdust (It is too small and the birds may eat it instead of their food), or treated wood chips. Sand, straw, or dirt will also work but are not as good as the others. Put the litter all over the floor at least 1 inch thick. Keep it covered for the first day with newspapers to keep the chicks from eating the litter instead of the feed. To avoid possible leg problems, remove the papers after the first day for heavy breeds and meat birds and after the third day for lighter breeds.

GRIT:
Starting the 3rd day sprinkle baby grit on the feed daily as if you were salting your food. Avoid putting too much at any one time as the bird may fill up on it instead of the feed.

PICKING: 
 Baby birds will often pick each other if they are too hot, too crowded,or without fresh air. Occasionally bright light also causes them to pick. An ounce of prevention is worth a pound of cure when it comes to picking. Sometimes, however, they pick for no apparent reason. To stop it try putting in fresh green grass clippings several times a day and darken the room. As a last resort, debeaking might have to be done. Try cutting off about one-third of the top bill. Do not cut the lower bill, just the top one. To treat birds that have been picked, smear pine tar or black grease on the injured area.

SPECIAL SITUATIONS AFTER THE CHICKS ARRIVE

IF THE BIRDS HAD A HARD TRIP:
 Instead of using the standard feed and water suggestions listed, try this: Put 6 more tablespoons of sugar in each gallon of water. Then mix some of this extra sweet water with some of your feed to make a soupy mix. Give your birds this special feed and water mix for 3 to 4 days to get them over the effects of shipping.

REAR END "PASTING UP":
Sometimes the stress of shipping causes the manure to stick to the back of the bird. It is important to remove this daily. Pull off gently or, better yet, wash off with a cloth and warm water. It will disappear in a few days as the bird starts to grow.

AFTER FOUR WEEKS:
1.Increase floor area to 3/4 square feet per bird.
2.Increase feeders to provide 2-1/2" to 3" of space per bird.
3.Increase waterers to one 5-gallon fount per 100 birds.
4.Make sure grit hopper is filled with proper sized grit. Check with your feed man.
5.Install roosts at back of brooder area. Allow four inches per bird with roost poles six inches apart.
6.Open windows in day-time. Leave only partly open at night.
7.Prevent water puddles around founts. Place founts on low wire platforms.
8.Birds can range outside on warm, sunny days, but only if clean range is available.

Original Post:  http://www.mcmurrayhatchery.com/chickcare.html


More How to Care for Baby Chicks  FAQ's

My birds are pecking at each other.  How do I stop them from pecking?

Make sure the birds are not overcrowding each other.  Also stress, feed deficiencies, illness and boredom all cause feather pecking.  Add grass clippings or leafy alfalfa hay to the pen to eliminate boredom.  If this does not work, you may try an anti-pick spray or anti-pick device which fits over the beak.
Can I have the beaks trimmed on the baby chicks?

We do not offer beak trimming service for the simple fact that the beak will grow back if the procedure is performed on birds under 6 weeks old.  If you decide to have the beaks trimmed we recommend having it done before the birds start to lay.
When will my hens start laying eggs?

It varies from breed to breed.  Some breeds will start to lay as early as 17 weeks old and other breeds may take up to 30 weeks before they start to lay.
Do you recommend the Marek's Vaccination?

Yes! It is a good idea to have them vaccinated as it helps build up their antibodies. A single vaccination confers lifelong immunity, but is not 100% foolproof.  About 5% of the chickens vaccinated can still get the disease anyway.

What is Marek's Disease and how do I control the disease?
Marek’s is a widespread disease affecting domestic chickens in all sections of the world. It is characterized by lesions affecting the nervous system, organs, and other tissues. Young chickens under 16 weeks of age are most susceptible. There is no treatment for Marek’s once the birds are infected. Chicks must be vaccinated as close to the time of hatch as possible for the vaccine to be effective. Some hackeries vaccinate all of their own breeding stock and strongly feel that you should do the same. Vaccinating your birds for Marek's is another appropriate step in strong poultry management. Don’t take any chances. When offered vaccinate your chicks prior to shipment of your order. Don’t forget to mark your order blank in the appropriate location for vaccination.

Vaccinations are offered by http://www.mcmurrayhatchery.com/faqwhatismareks.html  and http://www.efowl.com/?Click=44040  and  http://www.californiahatchery.com/?AffId=34 when requested at the time of ordering your new chicks


Should I medicate my birds for worms right away?

You can do it before they start laying, but if you medicate them after they start laying, you must wait 30 days after treatment before you can use the eggs.
How much light do my birds need once they begin to lay eggs?

For maximum egg production, it is recommended that hens get 14 hours of continuous light each day.  They need periods of darkness as well.  It is best to monitor the amount of light they receive with a timer set to turn on and off consistently at the same time every day.
How do I get my chickens to lay in the nest box and not on the floor?

In order to coax your chickens to use the nest box, it should be located 18 to 20 inches from the floor.  Also, try to eliminate any dark corners as they like to hide in dark spots to feel protected while laying an egg.
How many nest holes do I need for my hens?

Figure on about 7 hens per nest box hole.
What is causing my chickens to loose their feathers?

Chickens go through a normal molting stage at about 18 months old.  This molting period usually lasts for 3 to 4 months.  Egg production will cease during the molting period, but will resume at a slower rate after the birds end molting.

..

Salmonella and Safe Practices for Handling Poultry


 http://media-cache-ak0.pinimg.com/originals/20/68/67/2068679f5b1480405d60f1b0b32c6e1a.jpg

Avoid Salmonella Exposure:

Safe Practices for Handling Poultry

Source: Ohio Poultry Association

Don't Forget! Always wash your hands.Even healthy and clean looking birds can be carriers of Salmonella bacteria. Salmonella bacteria are in the droppings of many chicks and ducklings and contaminate their environment and the entire surface of the bird.

Basic Safety PracticesIf you choose to own chicks, ducklings, or other birds, following a few basic steps can help you avoid exposure to Salmonella.1. It is absolutely essential to wash your hands with soap and warm water immediately after touching birds or anything in the birds' environment.

2. Chicks and ducklings are not appropriate pets for children under five years of age.

3. Do not allow the birds to be close to your mouth or face.

4. Live poultry should be kept outside.

5. Adults should clean cages/pens. Litter should be frequently changed.

6. Do not handle birds before or while cooking, eating or doing other kitchen tasks.

7. Do not use the kitchen sink to clean bird cages, feed or water containers.

8. If you are experience abdominal pain, fever, and/or diarrhea, visit your physician right away.
 

Salmonella can cause serious illness, especially in infants and young children because they are more likely to put their fingers in their mouth and because their immune systems are still developing. Older adults, pregnant women, people on chemotherapy, diabetics and people with weakened immune systems may also have more severe symptoms.
.
.
Below are links to several brochures from various organizations which provide information on Salmonella, food handling, and biosecurity:
McMurray Hatchery has always and will continue to work diligently to produce the healthiest chicks possible.  We test for Salmonella along with many other diseases, and there has not been an issue with our parent stock or the chicks we send to you.

The U.S. Department of Agriculture's (USDA) National Poultry Improvement Plan (NPIP) implemented a new Salmonella Monitoring Program early this year. This program includes vaccination and testing for Salmonella. McMurray Hatchery has already vaccinated our parent stock and has increased our testing and monitoring.

The best way to control any poultry disease is proper management of your flock. Here are some key items to keep in mind:
  • Educate. Educate yourself and your family about raising poultry. There are many excellent books available. We recommend Guide to Raising Chickens or The Chicken Health Handbook by Gail Damerow. You may also want to contact your local Extension Office to find out what classes and materials they have available. Friends and family who have raised chicken for many years can also be an excellent source of help and information.
  • Clean. Keep your pens, equipment, coops, and chicken yards clean and disinfected. Make sure waterers and feeders are clean and filled with fresh water and feed at all times. We carry several disinfectants that you can use for cleaning coops, pens, and equipment: Virocid, Tek-Trol, and Quat-a-mone.
  • Protect. Keep your birds away from wild birds, rodents, and other animals that can carry germs and diseases. Diseases can be carried into your coop accidentally. Wash and disinfect footwear, tools, equipment, and other items before entering your coop.  Keep new birds separated (quarantined) for at least 30 days before introducing them into your flock.
  • Watch. Keep an eye on your flock.  Isolate and treat sick birds right away.

When keeping your own poultry, the responsibility falls on you to keep your birds healthy and happy. You can trust us to do our part, supplying you with healthy chicks.

What better way to know your food is safe than to raise or grow it yourself?

Tuesday, July 29, 2014

More about Preparations Before the baby poultry arrives


Preparations Before the baby poultry arrives
Have a clean, disinfected facility ready for the arrival of the babies, which is free of rodents and has been sprayed with an insecticide such as Sevin or Malathion. Iodine, Cresylic Acid or Quaternity Ammonia products are satisfactory disinfectants. 

  1. Baby poultry may be started using a floor brooding plan or a wire floor brooder system.
    1. Floor brooding plan
      1. A variety of products can be used for initial brooding to provide a draft free environment. Most commonly used is a 12- to 18-inch high cardboard brooder ring formed around the brooding area. A circle five feet in diameter is needed for 50 chicks. Increase the size of the ring proportionately to the added number of chicks to be started. Other products that have been satisfactorily used include large cardboard boxes, stock tanks and children's plastic swimming pools.
      2. Cover the floor with an inch or two of rice hulls, shavings, ground corncobs or other semi-coarse, absorbent products that do not easily mat. DO NOT USE CEDAR SHAVINGS! Cedar is toxic to chickens. The litter should be covered with burlap material, cheesecloth, paper towels or other non-slick material for the first three days. This will prevent the babies from eating the litter, reduce the possibility of the babies from becoming sprattle-legged and provide for easy access of feed sprinkled on top of the material.
      3. Provide an adequate size brooder or one 250-watt heat lamp with reflector for each 50 babies. It is never wise to depend on only one heat lamp, so for insurance, provide at least two heat lamps regardless of the number of babies. Red heat lamps are preferred as they provide ample light without providing excessive light that may lead to picking. The heat lamps should be hung about 18 inches above the top of the litter. Check to be sure that they heat.
      4. Have available feeder lids for the feed. A box cut down to have one-inch sides is suitable. For bantams and game birds, sides only one-half to three quarters inch are preferred.
    2. Wire floor brooding system
      1. The wire floor should be made of wire material not larger than the size of one- half-inch hardware cloth. For bantams and game birds one-fourth inch square wire floor material is preferred.
      2. Provide an adequate floor space as specified by the brooder manufacturer. The manufacturer generally recommends only the number of chicks that may be started in the brooder. After about two weeks, more space will need to be provided if the maximum recommended number have been started.
      3. Check the brooder to be sure it is heating correctly.
      4. Most brooders have a small light to signal when the heater is on and also a light for the babies to see at night. If the brooder does not have a night-light, one needs to be provided, preferably a 15-watt red light.
      5. Have available feeder lids for the feed. A box cut down to have one-inch sides is suitable. For bantams and game birds, sides only one-half to three-quarters inch are preferred.
      6. Most brooders are provided with water troughs. It is wise; however to also provide extra water founts to start the babies. Generally the brooder water troughs provide too much water access for starting ducks, bantams and game birds.
      7. Cover the wire for the first day or so with a non-slick material such as burlap, cheesecloth or paper towel. Do not use newspaper, as it is too slick and the birds will slide resulting in sprattle-legged birds.
  2. Purchase feed recommended for the baby poultry that you have purchased.
    1. Do not purchase more feed than will be consumed within two or three weeks, as the feed will lose some of the nutritional value, become stale and lose it's palatability.
    2. Commercial chick starter containing about 20% protein is recommended for starting bantams and layer type baby chicks.
    3. Chicks being raised for meat should be started on a high protein – high energy rations that will produce rapid growth.
    4. Ducklings and goslings should be started on starter containing at least 20% protein that does not contain any arsenic medication.
    5. Turkeys, guineas, game birds and peafowl should be started on turkey or game bird starter containing at least 28% protein.

When the baby poultry arrives


  1. If the babies have been shipped by U. S. Parcel Post, examine them to be sure they arrived in good condition. If the shipment is an Insured shipment and the poultry arrived in poor condition have a postal employee examine the shipment. Postal regulations require that a postal employee certify shipment arrival condition when an Insurance Claim is being made.
  2. If the baby poultry arrived in poor condition or if there is any question regarding the shipment, immediately call Ideal Poultry and advise them of the problem or questions you have.
  3. Turn on your brooder or heat lamps and be sure that you have a warm area for the babies. Proper temperature at bird level under the brooder or heat lamp for the first week is 90 to 95 degrees. Reduce the temperature 5 degrees each week for the first five weeks. After that time the poultry will normally not require supplementary heat. Remember, baby poultry need to be provided with enough space so that they can move to the heat or away from the heat source according to their needs.
  4. Fill the water fountains with fresh clean water. To help boost the energy of the babies, add ½ cup of sugar to each gallon of initial water. Chicks start better if additional chemicals are not added to the water. Ideal does not recommend the use of Ren-O-Sal or Walko tablets.
  5. If fine grit is available mix grit in the ratio of 1 to 10 – grit to feed. Fill the feeder lids with a quarter inch of feed or feed and grit mixture and sprinkle a generous amount of feed or mixture on top of the non-slick material covering the litter.
  6. Live poultry can be a source of potentially harmful microorganisms; therefore, precautions must be taken when handling and caring for them, to prevent fecal/oral transmission among people. Adults must supervise children when they handle poultry to make sure that they do not put their hands or fingers into their mouth. Do not keep baby poultry or mature poultry in the family living space. Always wash your hands with soap and water after handling poultry.
  7. To help get the baby poultry off to a good start, remove one bird at a time from the shipping box, dip the bird.s beak or bill into the prepared water and place the baby into a feeder lid in a warmed brood area.
  8. Turkeys are more difficult to start than other poultry. It is wise to start a few chicks with the baby poults. To help them get started, put shinny marbles in the water and fine grit in the feed to help them find the water and feed.
  9. Ducklings, especially Mallards, dehydrate much sooner than other baby poultry. To prevent over consumption of water which results in water logging and death, provide access to readily available water for about 15 minutes, remove the water for 10 or 15 minutes and then, allow them to have water again. Do this two or three times and the ducklings will adjust to proper water consumption. Limit the depth of water so the ducklings do not get wet and spill water on the litter.
  10. Watch the babies carefully for the first hour or so to be sure they are finding the water and beginning to eat. Observe their activity relative to the heat. Chicks will locate where they are most comfortable. If they are comfortable they will be spread out in the available brooding area. If they are too cold, they will hover or crowd under the heat source. If they are too hot they will try to move away from the heat source and will pant in an effort to cool themselves. If there is a draft, they will crowd away from the draft.
  11. After two days of fresh water, give 3 days of vitamin and electrolytes in the water at the manufacturers recommended dosage level. This can be repeated for three days every other week. Ideal does not recommend the use of vitamins and electrolytes on a continuing basis or their use above manufacturers recommendations. The proper use of vitamins and electrolytes in the water will help prevent leg weakness in broilers and turkeys.
  12. Keeping the brooding area dry is essential. Removal of wet or caked litter is necessary for proper health of the flock. Proper ventilation, providing as much fresh air as possible will help in keeping the litter dry and reduce the concentration of ammonia.
  13. Ideal does not recommend the addition of medications to the water or feed for the sake of giving the birds medication. Sulfa drugs used indiscriminately can lead to kidney damage. Overuse of antibiotics can lead to vitamins being chemically tied up and the antibiotics become ineffective if needed for a specific treatment.             

Original Post:  http://www.idealpoultry.com/care.html

They've Arrived - Now What?

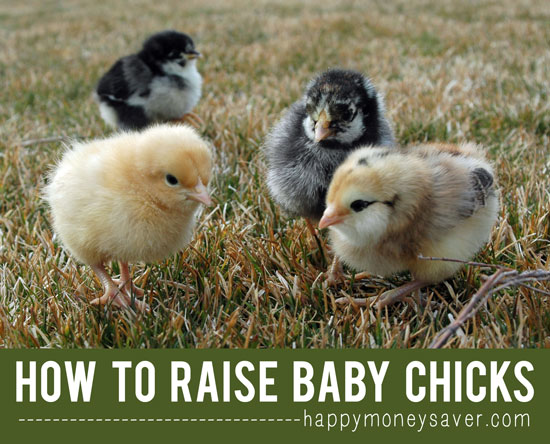
How To Raise Baby Chicks { A Beginners Guide with all the information you need to get started} Mmmm..fresh eggs!  happymoneysaver.com

How To Raise Baby Chicks
You will need a few supplies and items to care for baby chicks. Here are the supplies you need.

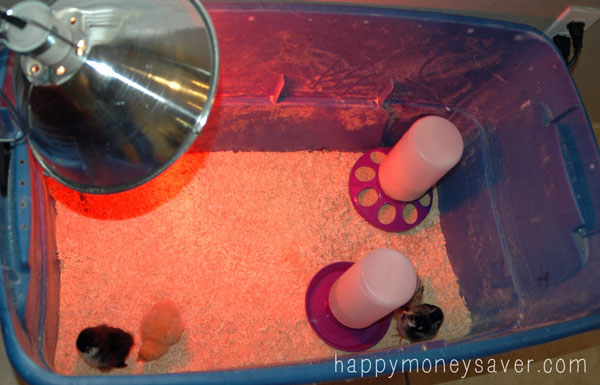
Baby Chick Brooder Box   A brooder box or bin to keep them in. You can use a stock tank, swimming pool, your bathtub or even an old kids swimming pool.  I used a plastic tote for my chicks since I already had them hanging around my garage. Some people use a cardboard box as well, but I don’t recommend it.
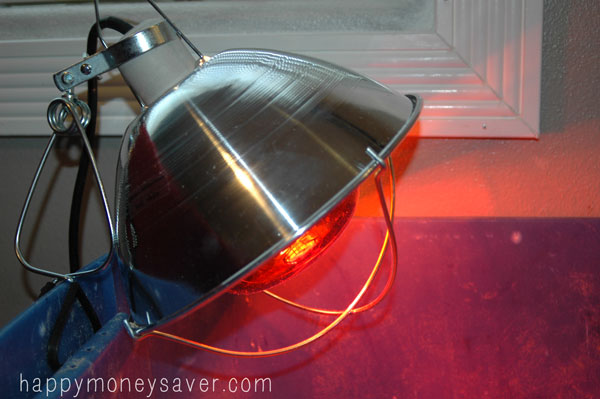
Baby Chick Heat Lamp   A Heat Lamp  + Heat Bulb.  When you buy your heat bulb try to get the red light heat bulb. Chickens will peck each other to death if they see blood, so the red light will make everything red thus avoiding any pecking injuries. You could also use a white heat lamp as well and just keep a good eye out for them. Consider also keeping a backup heat lamp just in case one burns out.
A Thermometer – You will be using a heat lamp with a reflector, which you can find usually at the feed stores or even hardware stores. The temperature needs to be around 90 degrees for the first week, then can be reduced by 5 degrees each week until the chicks have their feathers in (usually around 6-8 weeks).  Watch your chicks carefully though as they will show you if they are too hot or cold. If they are huddling in the corner farthest away from the light they are too hot, and if they are huddled in a ball under the light they are too cold. Just keep an eye on how they are reacting. Use the thermometer to get your heat lamp at the right height for the temperature needed. You can find these at your local Walmart or any hardware store for around $1.00.

Some sort of bedding. Pine shavings are what I use, but you can also use pine pellets, straw or other soft materials. Avoid cedar shavings and newspaper shreds as they are not great for chicks. Baby chicks do poop a lot so be prepared to be changing this often.


Feed – get chick starter feed from feed supply stores. This is all your chicks will need to eat. If you want to start giving them treats or bugs, wait until they are one to two weeks old first, and start some chick grit at the same time. I think the first thing I treated my chicks to when they turned a week old was a single shred of cheese, they loved it.

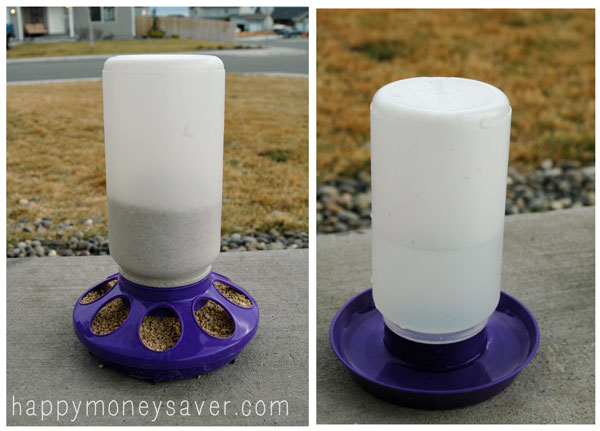
Chicken Feeder and Waterer  A Waterer and a Feeder - I used these little plastic ones you can find at feed stores for a couple of bucks each. Make sure and change out their water every day as they often poop and kick shavings in them.
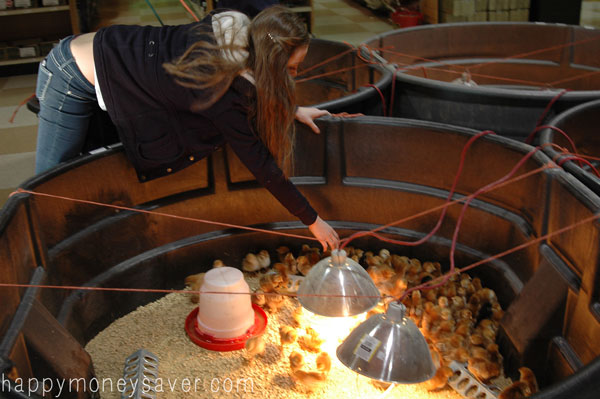

Netting or chicken wire to put above your brooder box. Little chicks will fly up within a few days usually to get out, so put netting over the top to keep them from escaping. You can use a little piece of chicken wire or fine hardware mesh that covers it.


The big Chicken Coop they will be using when they are older. It’s best to get this figured out early so they are not giant chickens in a little bin while you are trying quickly & frantically to build a coop for them.

Where to get baby chicks

Buy Baby Chicks    I called the feed store in my town to see when they have their “chick days.” Turns out most feed stores have a day where they will get in a huge lot of baby chicks where you can choose to pick up just a few or a large lot of chicks. Some even offer free deals where if you buy the feed you will be able to get a free chick. Make sure when you call you ask what breeds of chicks they will be getting in.
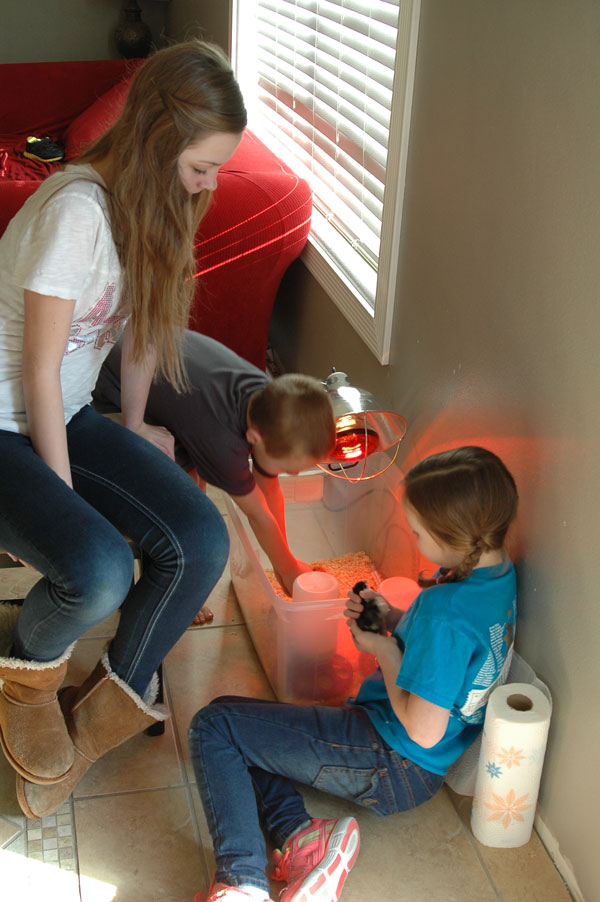
Do some research on the kind of chickens you want to raise – whether for meat or for laying, fancy or bantam, temperaments and more.

I had my kids go online and google pictures of which breed of chicken they would like to raise. They chose by color pretty much. We went down to our local feed store on “chick day” where they each brought home the kind of chick they wanted. Going the feed store was perfect for us since we are only able to have a small amount of chicks and we were able to get a variety of chicks. It was so much fun and the kids had a blast (read about it here).

You can also order your chicks or hatching eggs online. Make sure and watch because most online chicken companies will require a minimum chicken order. If you only need a few chicks consider splitting a batch with a friend. Here are some places you can order baby chicks online:

Other hatcheries:

 Caring for your baby chicks at Home

How to Raise Baby Chicks    Whether you just came back from the post office or the feed store with your new baby chicks in hand, make sure all you have their nice little brooding box all ready to go. Make sure you have read all about how to raise baby chicks so you are prepared.
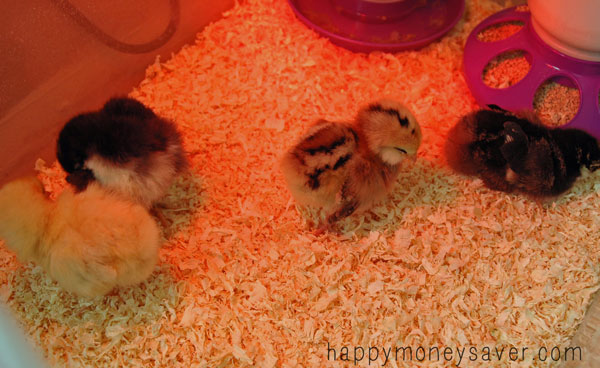
The first thing you need to do is dip their little beaks into their waterer for a second so they knew where the water is.
Baby Chicks Care    Then they will chirp around, eat their feed, poop and sleep.  They will just be running one minute and then drop like they are dead the next.
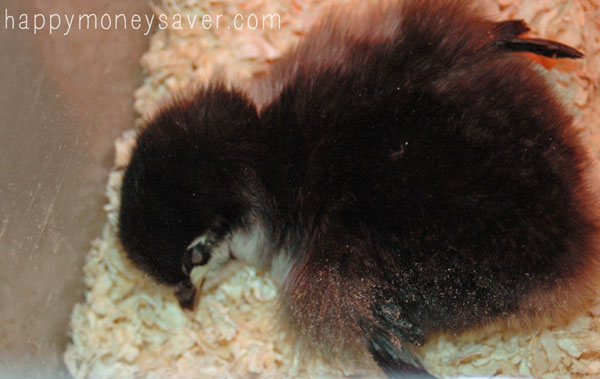
Sleeping chick   The drop-dead-look is normal, it’s just how they sleep. They are so adorable.If you find your chicks are constantly kicking their pine shavings into your waterer, add a book covered in a ziplock bag or a weight underneath. It helps a little. But still check the waterer often for poop and shavings. Wash it in soap & water periodically also to keep them healthy.
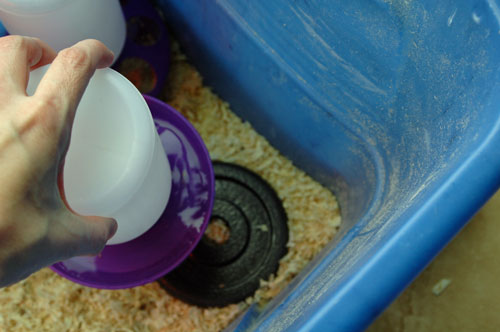
Chicken Waterer

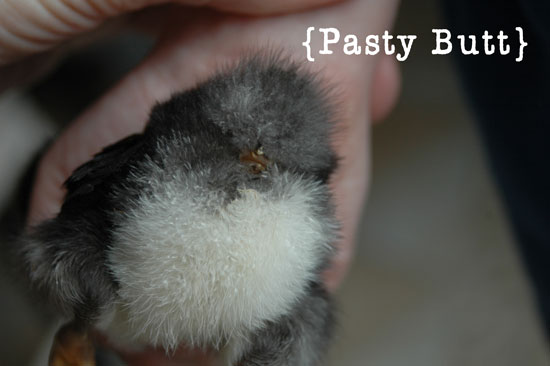
 Chicken Poop & Pasty Butt

Keep an eye out for a condition called Pasty Butt with baby chicks during the first week. If the chicks get their poop stuck to their bums, it can seal it up and will kill them if they can’t go. So if you start seeing any poop stuck you gotta wash it off. Only one of our 4 chicks had this.  Sorry if you are grossed out by this, but farming ain’t all flowers and fresh milk. 


Oh yeah, I am making you look at a chicken’s butt.  Tee hee..
Baby Chick Pasty Butt  So when your chick gets Pasty Butt you just need to take a warm wash cloth and wash the poop off gently. No picking it off, it can hurt them. We had our baby chick sit in some warm water (in a bowl) and gently washed it off.
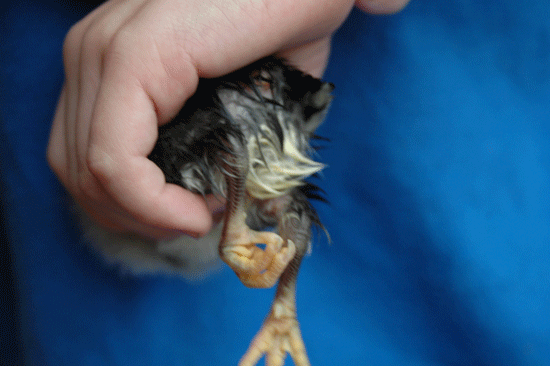
Washing Baby chick   Problem is when they have wet feathers, the others will peck at them so you will want to separate them until dry. My son held our chick with a wash cloth until she was dry. He loves doing things like that.
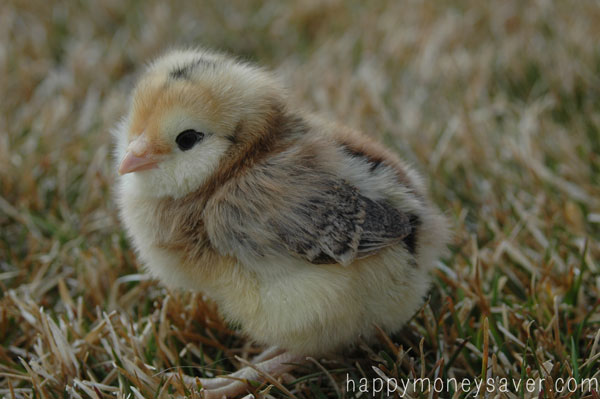
How often do you change their pine shavings? It all depends on your preference. I had my chicks in the house and once I could smell it I would be changing it. This was usually every 3-4 days. During the first two weeks it seemed like their poop was out of control, but as they got older their poop changed to a different consistency and I was able to change it once a week.

THE COST

I spent around $50-$60 for all the supplies I needed for my baby chicks including feed and bedding for 2 months. But the real expense can come with the big chicken coop you need to buy or build. If you are super thrifty you can use scrap wood, pallets or other materials and create for a really low cost. .

Starting up chickens : cost me around $60 for all these items:
  • Large plastic tote (free in my garage) you can also use a cardboard box! 
  • Pine shavings ($10)
  • Heat Lamp with red light ($20)
  • Waterer ($5)
  • Feeder ($5)
  • Thermometer ($1.00)
  • Feed ($18 for a 50 lb bag – should last a few months)
  • 4 baby chickens ($12)
We have LOVED having baby chicks. They are very entertaining. Just for fun try scratching your finger to the bottom of the pine shavings bin and see if they copy you (its so cute seeing them learn to scratch for the first time.)  After a few weeks we offered them a few treats (you can buy freeze dried worms and they go nuts…). But our favorite thing is when they just fall asleep in our hands, it is the sweetest thing ever.

Original Post By:  http://happymoneysaver.com/how-to-raise-baby-chicks/


FYI 
Hens will begin to lay at about 20 weeks of age. It does vary some from breed to breed. You also need to be sure that your hens are getting enough light. Poultry needs 14 hours or more of light per day to lay efficiently. This means you may continue to apply artificial light during the winter months. 


..

Important Guidelines for Before you receive your day old chicks

Guidelines for Raising Baby Chicks


Posted by CaliforniaHatchery.com on 7/5/2013

Before you receive your day old chicks, there are a few things you should have ready:

1) A heating lamp and brooder area- The heating lamp temperature should change according as your chicks grow. Follow the heating lamp temperature guidelines below to provide optimal temperature for your chicks:
Week 1- 90-95 degrees fahrenheit
Week 2- 85-90 degrees fahrenheit
Week 3- 80-85 degrees fahrenheit
Week 4- 75-80 degrees fahrenheit
Week 5,6,7- 70-75 degrees fahrenheit
Week 8- 65-70 degrees fahrenheit
Week 9- 65 degrees fahrenheit
How to Care for baby chicks  The heating lamp should be placed 12-18 inches above the floor of the heating area. Some signs that your heat is too low- Your chicks will huddle together in the brooder. If the temperature is too high, your chicks may be dispersed throughout the heating area, and they may look tired. If the temperature is set correctly, your chicks will be evenly dispersed throughout the heating area, and they will look lively while making lots of peeping sounds!

2) Fresh water should always be made available to your chicks or ducklings

3) Non-medicated organic starter feed (offered through californiahatchery.com)

4) A stable surface (preferably with wood chips) for your chicks or ducklings to move upon. Make sure to clean the brooder area at least twice a day 


VERY IMPORTANT Chick Care Instructions

Raising baby chicks is easy!You should first consider where to keep your baby chicks before placing your order. We recommend setting up a brooder house which can be anything from a cardboard box to an actual building depending on the size of your soon-to-be-acquired flock. The area should be kept clean, dry and draft free.  Prepare your brooder before ordering your chicks.
    

Brooder Surface
For the first 4 or 5 days after they hatch put the chicks on a non slippery surface.
Hardware cloth is the recommended surface of choice. 


The non slippery surface will help the chicks learn to walk and aids in  preventing sprained legs. Once the chicks have a few days on this surface and have figured out the source of their chick feed, spread some type of litter on the floor 2 to 4 inches deep. Wood shavings work well for this purpose and attention should be given to keeping the litter clean and dry.

Chick Heating Lamp and Brooder
 
An
infrared Heat Lamp will keep your chicks warm. California Hatchery offers a Red Heating Bulb as this will cause less pecking.  


Initially the temperature should start at 95 degrees and lowered 5 degrees each week until 70 degrees is reached. At this point the heat can be removed unless the temperatures outside the brooder area are still quite cold. Position your lamp so that it will maintain the proper temperature, yet not pose a threat to igniting the litter or burning the chicks

The chicks are the best indicators of whether or not you are providing them with adequate heat. If they are all huddled together under the lamp you need to increase the heat in the brooder. Conversely, if they break off into little groups well outside the lamp, it's too hot. Ideally your chicks should be feeding and drinking and generally scattered about the brooder area.

Chick Starter and Developer Feed
 
Food and water should also be provided to your baby chicks. We recommend dipping the chick's beaks in their water and feed to familiarize them to their food and water source.  


The available water supply should "grow" with your chicks. You will need an adequate number of containers to accommodate the size of your flock. As the chicks grow their consumption increases and you will need to increase their water supply. 

Initially the chicks will need a small water supply of some type with marbles or small pebbles placed in it to keep them from swimming. Water is vital to the chicks survival, but being wet is not! 
 

The same basics hold true for your feeders. The bigger the chicks get the larger feeder you will need. 

Your chicks should be fed Chick Starter Feed, which is available to order from our website. This feed contains approximately 23% protein for young chicks, and is non-medicated

After about 18 weeks, you can switch to our Layer Developer Feed which contains about 17% protein for older chicks and young chickens.
 

..

Nite Beam Products Enters Pet Market with Safety Leashes, Collars


Nite Beam Products Enters Pet Market with Safety Leashes, Collars

Nite Beam Products,
a manufacturer of LED safety products, has debuted its pet collars and leashes. The company’s LED Collars are comfortable and non-abrasive, and  they help keep pet owners and their pets visible in low-light situations.

Pet owners simply push the button on the battery case and select between on (constant light), flash or off. 


The collars come in three sizes: small for neck sizes 9-13 in., for dogs up to 15 lbs.; medium for  neck sizes 13-19 in., for dogs between 15-60 lbs.; and large for neck sizes 19-24 in., for dogs 60 lbs. plus. The collars come in blue, red, orange, pink and safety green.

Nite Beams’ LED Leash provides high visibility from a distance of  up to 1,400 ft. Due to the increased visibility, motorists have time to  react, providing pet owners peace of mind while out for a walk. All leashes are made of high-quality, durable and waterproof materials. Fabric and LED lights are available in red, blue, green, orange and pink. The leash comes in two sizes: small (3/4 in. wide by 6 ft. length)  and medium/large 1 in. wide by 8 ft. length).


- See more at:
http://petbusiness.com/articles/2014-07-29/Nite-Beam-Products-Enters-Pet-Market-with-Safety-Leashes-Collars-#sthash.Vw8Bp9bE.dpuf


Whether your pet is on a leash or not they should always be visible in the darker hours with a NITE BEAMS TM LED collar. Our LED lighted products provide you and your pet with HIGH visibility from a distance up to 1400 ft. (1/4 mile).

Due to the increased visibility, motorists have time to react providing a peace of mind while walking your pet.

All LED collars are made of high quality, durable and water-resistant materials for years of use. Please see chart below for sizes and LED light colors available.

We backup our quality with a 1 year guarantee on all NITE BEAMS TM pet products. p.s. Don't forget to order extra for friends and family.

Small (S) - Fabric and LED lights available in red, blue, green, white, orange, purple and pink. (3/8" width)

Medium (M) - Fabric and LED lights available in red, blue, green, white, orange, purple and pink. (3/4" width)

Large (L) - Fabric and LED lights available in red, blue, green, white, orange, purple and pink. (1" width)

Nite BeamsTM LED Pet Collar (Medium Orange with orange LEDs (13"-19")) 

.

Nite Guard Solar Predator Control

Nite Guard Solar NG-001 Predator Control Light, Single Pack

 
Solar Powered Nite Guard Solar uses sunlight or daylight to charge. No batteries are ever needed. It will continue to activate during long periods of cloudiness.

The powerful flash of red light produced from this LED system will automatically activate at dusk and will force all night animals to flee the area. Based on scientific research, Nite Guard Solar emits a flash of light implying to all animals that hunt or feed at night that they have been "discovered" or are being watched. This is their deepest fear and forces them to flee the area.

A simple, but effective concept. Automatically turns on at dusk and off at full daylight. This weatherproof unit will last approximately 3-4 years.

Use the Nite Guard Solar to protect poultry and livestock against coyote, fox, bear, mountain lion, wolf, bobcat, owls, hawks, mink, weasel, and skunks, gardens (flowers, vegetable), orchards, vineyards against deer and raccoon, bird feeders, purple martin houses, fish ponds against raccoon, hawks, owls, blue heron, and bear, campsites, cabins, and property against bear, raccoon, mountain lion and even human intruders. 60-day money back guarantee, 1-year limited warranty.

Mount the lights at eye level of the animal to be stopped and face it away from the area to be protected. One to four lights will be required depending upon your application. It not motion activated but will flash automatically from dusk through dawn so night animals are stopped at long distances (500 yards or more) away. They do not come in to investigate but see the flash as a threat the instant they are aware of it.

Maintenance Free: Nite Guard Solar is completely weatherproof and will continue to function or years under extreme weather conditions. Blistering heat, below zero temperatures, rain, ice, snow and blowing dust/grime will not compromise the nightly function of this product


  •  

      •  
      • A constant flash of light to all animals that hunt or feed at night that they have been "discovered" or are being watched.
      • Protects Gardens, Poultry, Livestock, Campsites, Property and much more.
      • Solar powered and light sensitive turning on at dusk and turning off at full daylight.
      • No switches, its all automatic just remove the black protective tape that covers the solar panel.
      • Weatherproof 
      •  
      To Learn More or To Order:  Nite Guard Solar NG-001 Predator Control Light, Single Pack

      ..

      Monday, July 28, 2014

      All About The Affectionate Ragdolls

      Ragdolls are large, laid-back, semi longhaired cats with captivating blue eyes. The Ragdoll is a pointed breed, which means that the body is lighter in color than the points (the face, legs, tail and ears). 

      The Ragdoll cat is carefully bred to produce large affectionate animals in three patterns, two with white (mitted and bi-color) and one with no white (colorpoint). 

      The ideal Ragdoll is a well balanced cat, with no extreme features. Altered males will usually top the scale at 15-20 pounds; females are proportionately smaller and usually weigh between 10-15 pounds at maturity. 

      Ragdolls are slow-maturing, reaching full coat color at two years, and full size and weight at four. 


      Ragdoll cats tend to be more interested in humans than some breeds of cats. They are known to run to greet you at the door, follow you from room to room, flop on you, sleep with you, and generally choose to be where you are. Many Ragdolls have been taught to come when called and play fetch. They are gentle cats, and usually play without extending their claws. Ragdolls tend to be floor cats, not jumpers. The Ragdoll’s semi long coat is plush and silky, and requires minimal grooming to keep it looking its best. They should be combed with a steel comb on a regular basis to find and remove any loose hair or tangles. Quality coats consist mainly of long, soft guard hairs. Ragdolls, just like all breeds of cats, will shed, usually with the change of seasons.The absence of the thick, dense, insulating undercoats results in reduced shedding and matting. In all, Ragdolls are well behaved, and easy to care for – perfect for our modern, busy, lifestyles.

      There are four patterns: bi-color, van, mitted and colorpoint. Patterns come in six colors: seal, blue, chocolate, lilac, red, and cream. Points may be solid, lynx, tortie, or torbie (tortie and lynx). If you do the math, you can see that there are quite a large number of different combinations possible! CFA accepts bi-color and van patterns, mitted and colorpoints for showing in the full array of color combinations.


      Colorpoint Ragdolls have the classic pointed markings with no white anywhere in their coat. Mitteds have white feet in the front and white boots that go all the way up and around the hock in the back, a white chin and belly stripe. Mitted Ragdolls may have a blaze, star or hourglass shaped patch of white on their forehead and nose. Bi-colors have more white; all four paws, their underbodies, chest, and an upside-down ‘V’ marking on their faces are white.  

      Ragdolls were developed in the 1960’s by Ann Baker; a breeder in Riverside California. The origin of the Ragdoll breed consisted almost entirely of free-roaming cats. Ann bred Josephine, a domestic longhaired white female that was found running loose in her neighborhood, to other cats she owned or found. The offspring of this female had unique temperament traits that were very endearing. By selecting individuals with the look, temperament and criteria she wanted for her breeding program, she created the Ragdoll breed.

      Pricing on Ragdolls usually depends on type, applicable markings and bloodlines distinguished by Grand Champion (GC), National Regional winning parentage (NW or RW) or of Distinguished Merit parentage (DM). The DM title is achieved by the dam (mother) having produced five CFA grand champion/premier (alter) or DM offspring, or sire (father) having produced fifteen CFA grand champion/ premier or DM offspring. 

      Usually breeders make kittens available between twelve and sixteen weeks of age. After twelve weeks, kittens have had their basic inoculations and developed the physical and social stability needed for a new environment, showing, or being transported by air. Keeping such a rare treasure indoors, neutering or spaying and providing acceptable surfaces (e.g. scratching posts) for the natural behavior of scratching (CFA disapproves of declawing or tendonectomy surgery) are essential elements for maintaining a healthy, long and joyful life. For more information, please contact the Breed Council Secretary for this breed.

      Posted by:  http://www.cfainc.org/Breeds/BreedsKthruR/Ragdoll.aspx